If your clients constantly come in with lifted nails or peeling polish, maybe it’s time to reevaluate how you’re preparingthe nail plate prior to the artificial application or polishing natural nails.
“My client’s nails are lifting.”
“The product is lifting.”
“The client’s polish starts peeling after a couple of days.”
If manufacturers’ technical advisors have heard the complaint once, they’ve heard it a thousand times in one form or another. But as much as nail technicians would like to blame adhesion problems on a particular product system, 99 out of 100 times advisors have to gently point out that the problem lies in nail preparation.
The experts agree, no matter what type of nail service you’re performing, or which line of products you use, properly preparing the nail plate is paramount for artificial nails that don’t lift and for maximum polish adhesion on natural nails.
Prep Steps
There are three stages to prepping the nail. According to Sandra Engerran, corporate nail technician at Star Nail Products (Valencia, Calif.), to help prevent nails from lifting, the first step comes before you even touch the client’s hands. In other words, you need to consult with your client. She explains: “Find out if your client is taking any hormones or medications and about her daily activities and if her hands are in water a lot. Sometimes overhydrating the nail can cause lifting because there is a natural balance in your nails and if you overhydrate, you break the balance. It’s the same philosophy as stripping your hair. So if a client has extra dry skin, and the product you’re using requires two coats of primer, try priming the nail once.”
The second step is the physical preparation, which involves sanitizing your and your client’s hands and removing any polish. If doing artificial nails, Lin Halpern, director/new product division at NSI (W. Conshohocken, Pa.), recommends gently etching the natural nail vertically from the cuticle to the free edge to remove the shine with a 180-grit file (or per the manufacturer’s instructions). Next, dust off the nail to remove filings using a sanitizable, nylon brush because you don’t want to transfer oils or recontaminate the surface, she explains. “One of the most common mistakes nail technicians make in nail preparation is not paying attention to the U-shaped cuticle area of the nail plate,” says Halpern. When etching the nail plate, for example, Halpern says many technicians pay attention to the center of the nail and don’t get along the less visible sidewalls or near the cuticle area. The result? Lifting, which starts along the sidewall and works its way to the cuticle.
“The most important step in preparing the nail plate is to address the sidewalls because that area of the nails is soft. Without proper etching, dusting, and the application of a nail prep product, the artificial nail doesn’t stand a chance because water can seep in and causes the product to lift,” explains Halpern.
Jamie Slinkart, national education manager at Kizmit/Pro Finish (Scottsdale, Ariz.), points to not pushing back the cuticles during the prep stage as a precursor to lifting nails. “If you don’t push back the cuticles and remove the excess growth on the nail plate, you’ll end up applying the artificial product over the growth, which will result in lifting,” she says.
Also, if you use a file instead of a cuticle pusher to remove excess growth, since the skin is dry, you may leave behind small pieces, adds LaCinda Headings, educator for Creative Nail Design (Vista, Calif.) and an onychology instructor at Xenon International (Wichita, Kan.). “Even though the excess cuticle growth is dead skin, it still retains moisture, which causes product to lift,” she says.
Nadine Galli, regional manager of OPI Products (N.Hollywood, Calif.), uses a cuticle exfoliant before pushing back the cuticles. She wipes off the residue from the nail plate using polish remover or an antiseptic with a nail wipe or cotton. Next, she removes the oily glaze on top of the nail using a fine-grit file, then cleans the nail again with antiseptic.
Now you’re ready for step three, chemical preparation, says Halpern, in which you would apply a prep product to dehydrate and cleanse the nail plate. These products are usually formulated with ethyl acetate, butyl acetate, and isopropyl alcohol. Halpern explains how the combination of the three ingredients work: “Once they come in contact with the nail plate, they draw out moisture and oil like a sponge, evaporating them off the nail plate and leaving a chalky white finish. By doing this, the primer doesn’t have to fight moisture and oils to do its job. There are many theories on how primer works, says Halpern. “What we do know, though, is that the acrylic application creates a stronger bond when you use primer than when you don’t.”
With primerless acrylic systems, nail prep is especially important because primer is not being used to clean, dehydrate and prep the nails before application. Therefore, the nail technician must be sure to use other prep products to insure a sanitary, adhesive bond.
Dehydrator/cleansers actually raise the pH-level slightly to meet the artificial product because the artificial product has a higher pH than the natural nail, adds Galli. A dehydrator/cleanser is either combined into one product or sold separately. “If purchased separately, use the cleanser first to clean the nail surface so the dehydrator can penetrate the nail plate,” says Headings.
How the Pros Do It
While you can think of nail preparation as a three-step process, in reality, the last two stages intermingle, depending on the technician’s personal style. To sanitize the hands, Engerran recommends using a waterless cleanser or an antiseptic spray to rid the hands of germs. If using a soap-type cleanser for sanitizing, make sure your client rinses off her hands completely, because not doing so will leave a residue on her nails, which leads to lifting, adds Headings.
After sanitizing, Engerran performs a “mini” manicure on acrylic clients, which includes removing the polish and pushing the cuticle back. She prefers using a plastic cuticle pusher rather than a metal one, saying it’s gentler on the nail. After etching the nails, she uses a dry scrub brush to wipe away the dust, then applies an antiseptic spray to remove any remaining dust particles.
Even before etching, Slinkart uses a dehydrator/cleanser first to remove any oils, germs, and bacteria and to balance the pH-level on the nail surface for maximum adhesion of the artificial product. She applies it with a brush in a scrubbing motion so it completely penetrates the nail plate.
“The more you dehydrate the nail, the less chance you have to mold, fungus, and bacteria trapped under the artificial product,” says Galli. “When you start with a clean, oil-free nail plate you will have maximum retention of your product. Many technicians have problems with their clients’ nails lifting because they do not dehydrate the nail or clean the nail with an antiseptic to begin with. Spending a few extra minutes to prepare the nail plate can save you a whole lot of work during the fill process.”
As far as natural nail clients, Christy Bannister, director of sales at Seche International (Laguna Beach, Calif.), says many technicians use soap or polish remover prior to the base coat to clean the nail surface, which causes nail polish to chip or crack. “A lot of nail students are taught to clean the nail plate with polish remover or alcohol, which leaves its own residue on the nail plate,” she says. Other residues left on the nail include soap, lotion, cuticle oil, or body oil.
“You want to get rid of all these residues before applying base coat,” Bannister says. She recommends only using a nail prep product to remove the residue. “Preparing the nail plate properly is key to polish durability,” she says.
More Dos and Don’ts
When you’re doing a fill, you should thin down the artificial product and remove any lifted product before you push back the cuticles, recommends Headings. If you apply a cuticle softener first to remove the excess cuticle growth, the oil will seep underneath the lifting product and mask it. In addition to pushing back the cuticles, Headings uses a curette (a metal implement shaped like a melon baller) to scrape off any excess dead skin. “Although, you’ve already pushed back the cuticles, you’d be surprised at how much excess skin is still on the nail plate,” she notes.
If using primer, Headings cautions to apply it sparingly, because while it is not damaging to the nail plate, it can burn the skin. “Apply primer to the natural nail only, not to the existing product or on a tip because it can cause yellowing and cracking,” she says.
Sometimes, no matter what you do, lifting happens. For clients with chronic lifting, Halpern recommends reapplying the dehydrator/cleanser. “Nails that lift usually retain heavy moisture,” she says.
If the technicians she is teaching complain about lifting problems on their clients, Engerran suggests they prep one hand how they normally do it and the other hand the way she does it to see if there is a difference between the two hand after two weeks.
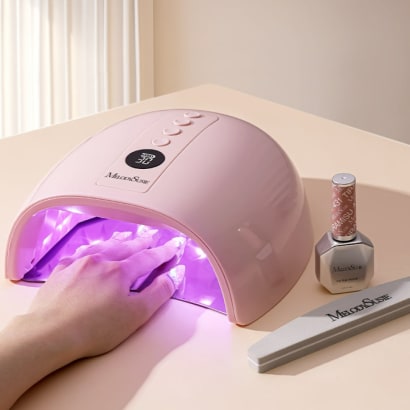
Basically, preparing the nails for the artificial application is similar for acrylic nails and gel nails. The major difference with gel nails is that you prime the nails using a non-acid prep product, which varies from manufacturer to manufacturer, says Halpern. “Some are applied with takalon brushes and cured with a UV light; others are a brush-on product that requires air-dry only.”
When it comes to natural nails, the focus is on preparing the nail properly for maximum polish adhesion. The most important step to accomplishing this, says Galli, is to use a pH-balancing solution that dehydrates the nail plate before applying base coat.
Headings agrees: “Lightly removing the shine with a buffer as well as cleansing and dehydrating the nail will make the polish last twice as long.”
The dehydrator/cleanser removes moisture and oils from the nail surface, says Halpern. “If you try to apply a lacquer to a moist surface, the lacquer skids over the surface, resulting in an uneven application and causing nail polish to peel,” she says.
Another factor in maximum polish adhesion is using a base coat says Halpern. “You don’t want to use a clear polish or top coat because they work as sealers whereas a base coat works as a binder,” she explains.
No matter what type of nail service you are performing, the bottom line on nail prep products, says Halpern, is that she gets enhanced performance from the finished product. “And if the nails look good, I look good,” she smiles.
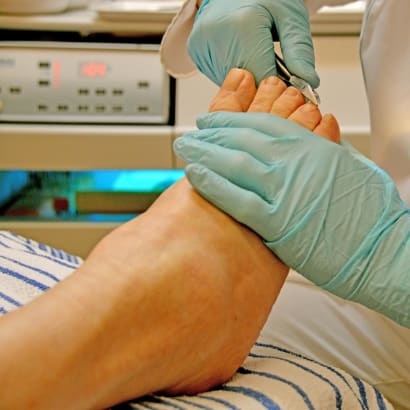
When etching the nail plate to remove the shine, Lin Halpern recommends a 180-grit file. Be sure to pay close attention to the sidewalls and cuticle area to avoid problems with lifting.
A dehydrator/cleanser, which removes oils and moisture from the nail surface, can be brushed on, sprayed on, or applied with a cotton pad. For clients with chronic lifting, Halpern suggests reapplying the prep product.
An important step in nail preparation is pushing back the cuticles to remove excess growth. Sandra Engerran prefers using a plastic cuticle pusher rather than a metal one, saying it’s gentler on the nail.