Every tech has seen clients who for one reason or another had to have their large toenails removed. Thistechnique will help you create a reusable prosthetic toenail that the wearer can be proud of
by Staff
January 25, 2011
3 min to read
Hope for the Hopeless Nail
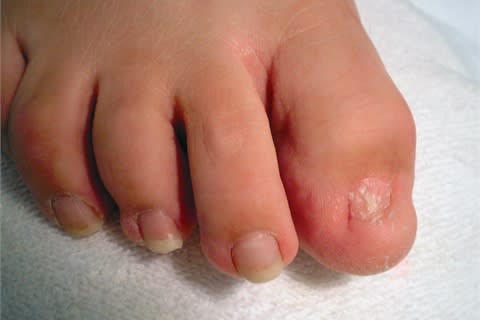
Every tech has seen clients who for one reason or another had to have their large toenails removed. Some will feel so self-conscious about this that they’ll refrain from ever wearing sandals or open-toed shoes again. But if a toenail-less client is desperate to look whole for an upcoming event, have no fear, Bri Mcloud of Happy Nails in Athens, Ga., has a remedy.
Ad Loading...
“The technique I am showing you will help you create a reusable prosthetic toenail that the wearer can be proud of. This nail will use acrylic to fill in the gaps and bumps of the destroyed nail bed to create a perfect fit to the nail that will hold snugly. If saved when it comes off, it can be reused up to five times, and usually lasts two to five days per use before coming off.
Clients can repaint the nail at home or bring it to you for a re-polish when they come in for their services. Most choose to go natural until the nail is needed for a special occasion.
On my client I used Bubble Bath by OPI, two coats on the large nail and one on the small nails to give them all the same color. I used Calling All Goddesses by OPI for the smile line to give a pearly American look. Apply top coat as usual and allow to dry. Your client now has beautiful new toenails.”
*As for at-home care, caution clients that wearing closed-toe shoes or boots will cause the nail to come off prematurely. This nail is not meant for everyday wear. Acrylic naturally releases from the skin by itself, but too much exposure over time can create reactions on the skin so she should not have a new toenail created every week. Remind your client this will last two to five days on the toe and give her a bullet tube of glue so she can reapply the nail later.
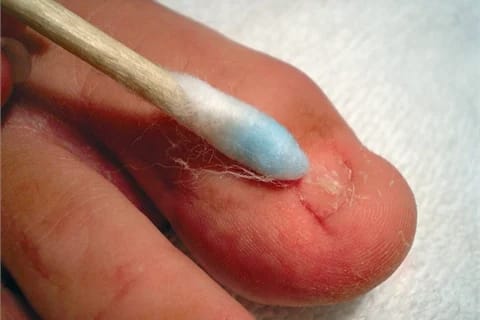
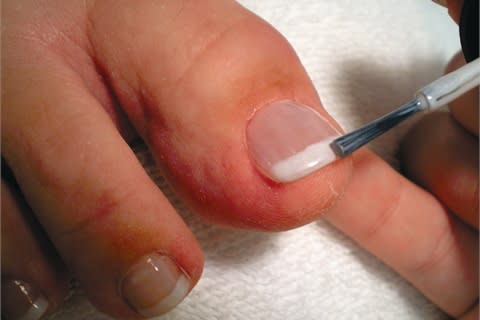
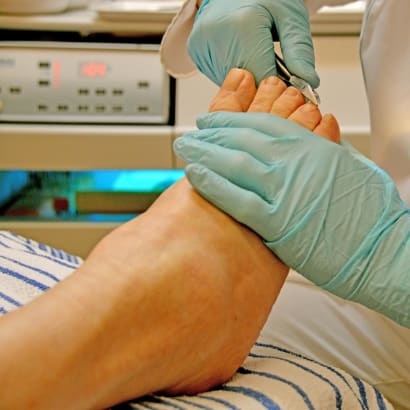
Step 1. Make sure the skin on your client’s feet is healthy and unbroken before you start this procedure. Since you’re applying acrylic directly to the skin, you want to take the utmost care and precaution when doing this service. When you are sure you can proceed, gently wipe the skin and the nail bed clean with alcohol and CND Scrub Fresh.
Ad Loading...
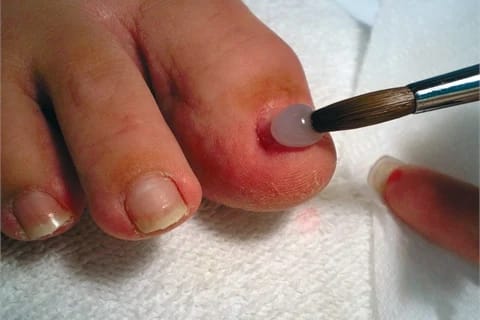
Step 2. Prepare your acrylic and apply one small ball to the base of the nail bed to fill the gaps and holes. Apply one or two more balls of moderate size and for a free-edge effect, flatten the acrylic and drag with your brush until a ledge is formed. You might also use a sculpting form if you need to.
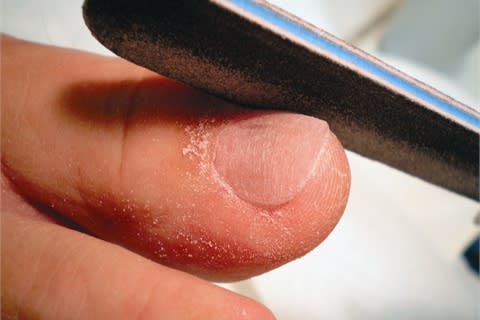
Step 3. Once the acrylic is dry, begin to shape and file the nail. With a fingernail you would normally pull back the skin to ensure you are not filing the client. However, since the acrylic on this type of application is actually almost flush with the skin you can’t do that. When filing, make sure you prep your file very well by scraping it against another new buffer or file to remove all sharp edges. Gently, without pulling the acrylic away from the skin, shape your free edge and your side walls. If you shape with your brush when you apply you’ll have very little filing to do. Go across the top and shape the apex and smooth the finished nail with a buffer.
Step 4. Once you have completed the nail, add a little cuticle oil to the client’s skin and around the toe to soothe and moisturize any file marks you have made. Then if you use clear or natural colored acrylic you will notice that you can see right though the new nail. If your client wants color, proceed with your application. If your client wants a French then you need to also paint the nail bed portion of the nail bed with a base color.
Marine-exclusive antioxidants act as a natural biological shield for the feet to help protect skin, smooth cracks, hydrate roughness, calm inflammation and disrupt bacterial and fungal activity, leaving feet feeling softer, smoother, more hydrated and healthier.
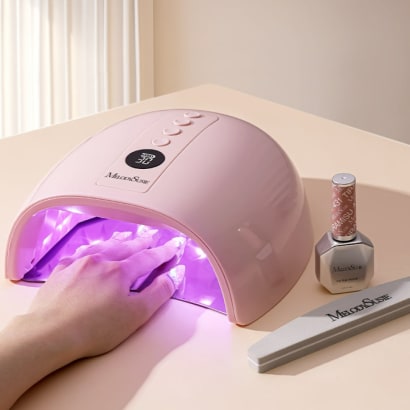
The MelodySusie P-PLUS30GT UV/LED Rechargeable Nail Lamp represents an upgrade in curing technology, designed to address several challenges through improved light reflection, intelligent heat management, and cordless operation.
Elevate your tip service with the OPI GELevate™ Extension System, featuring tailor-made Soft Gel Tips, GELevate 4-in-1 Builder with Intelli-Builder Technology and the Lightening Flash Cure Gel Lamp. This new system from OPI allows for flawless tips in no time.
Nail technicians are embracing the Medical Pedicure as a service and placing it on their menus. But what is it? What training is required? Is it within our scope of practice as licensed nail technicians?
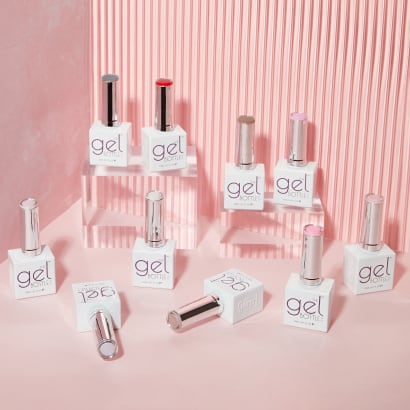
MelodySusie introduces the Fleurwee Gel Nail Polish series—a revolutionary gel polish that is HEMA/HPMA- and TPO-free, plant-based gel polish for a high-quality nail care experience.
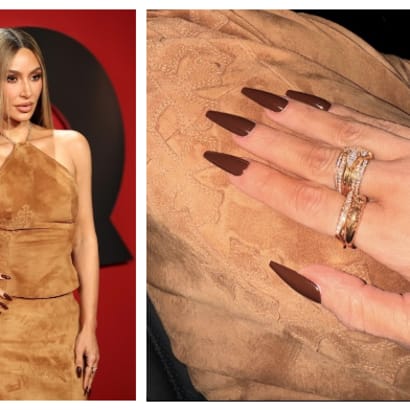
Kim Kardashian's manicure created for GQ’s annual 'Man Of The Year' event are the perfect understated, yet edgy look for fall or even the holiday party season.
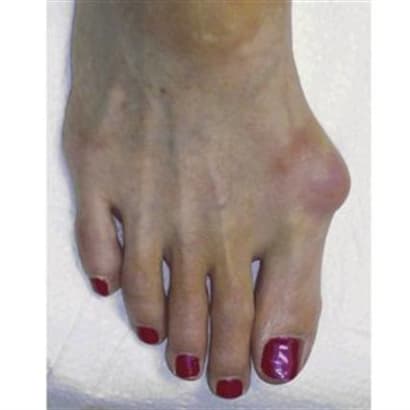
When the weight of the body lands on a swollen nerve, it can be debilitating. Learn the symptoms and alert clients to this common problem that develops in the nerves of the foot.
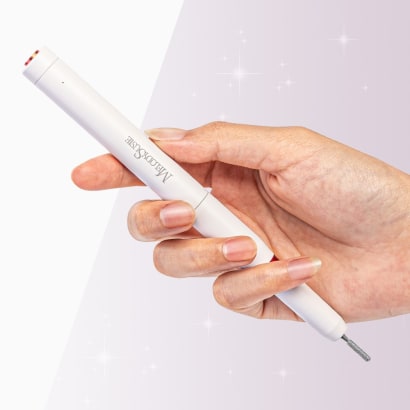
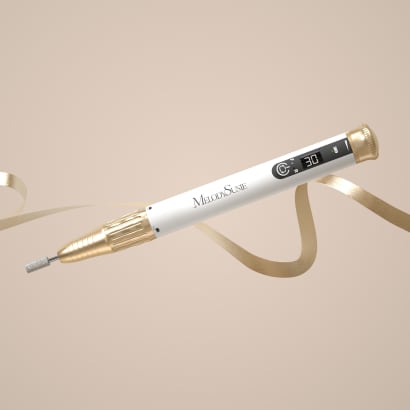
With the PC1 Nail Drill Pen, achieving healthy nails and a flawless manicure has never been easier. This user-friendly nail drill pen covers all your nail care needs.
Attending a presentation by Doug Schoon is an opportunity not to be missed for anyone in the nail care industry. His extensive expertise, commitment to accurate information, and engaging presentation style make for an enlightening experience.