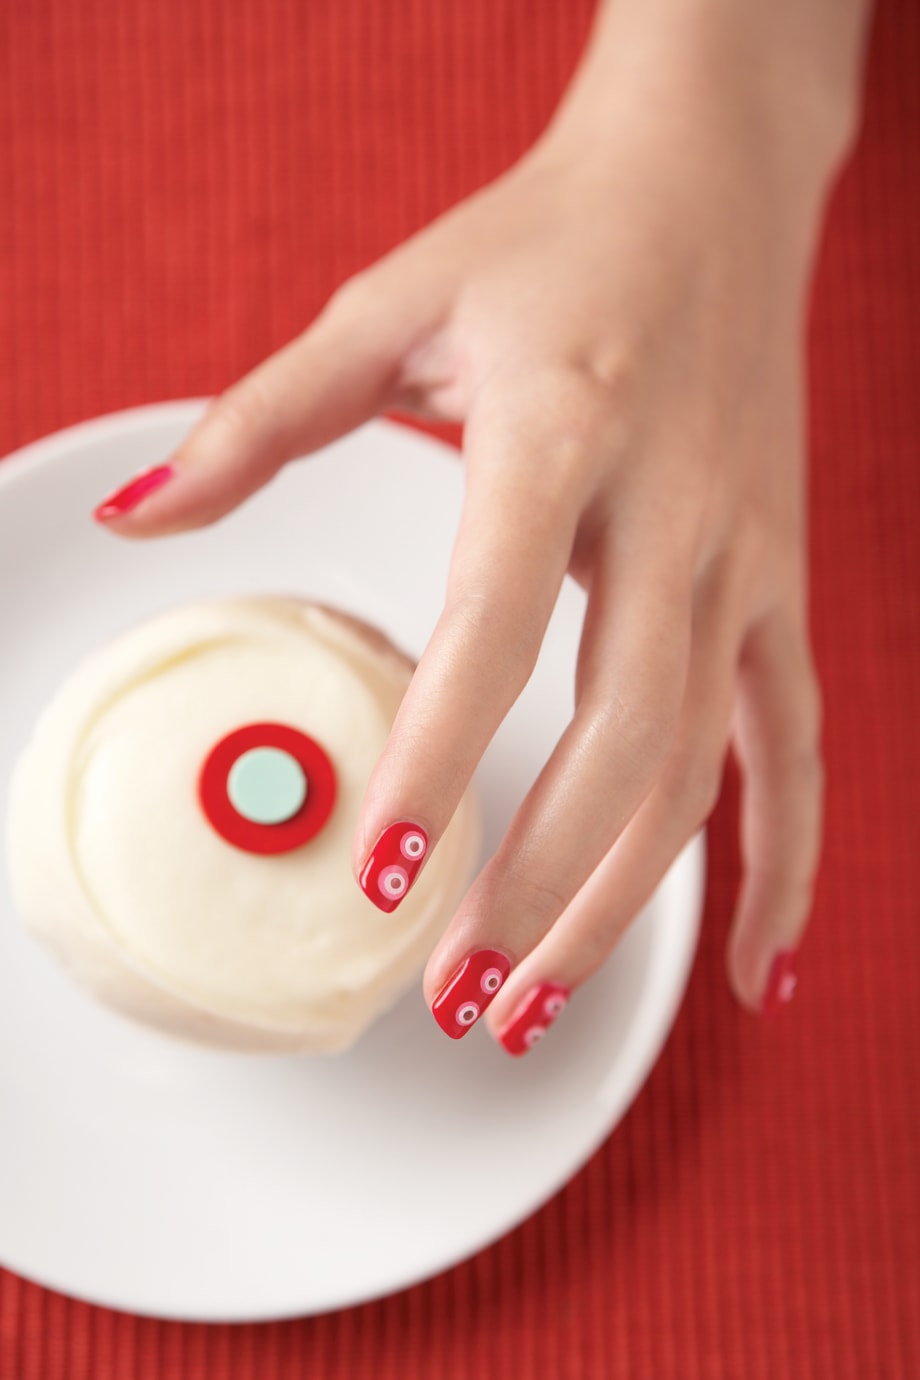
When Star Nail’s global education director Elaine Watson came in last fall to do a few covers for us, we were really excited about this design she showed us. She originally created it for a shoot she did for Star and as soon as we saw the simple dots, one thing came to mind: Sprinkles Cupcakes. (For those of you not in one of the cities where Sprinkles is available, let me just tell you that the cupcakes are delicious.)
These Sprinkles cupcakes were not the inspiration for the February cover nails. But when Star Nails’ Elaine Watson e-mailed us a picture of some nails she created we couldn’t think of anything else. We knew it would be a perfect combination for our candy-coated Valentine’s Day cover.
Star Nails' Elaine Watson created these awesome nails for the February 2011 cover.
The signature of these cupcakes is the dot on top of the icing — and it just happened to look a lot like Elaine’s nail design. She created this look using Star’s Eco Soak Off UV Gel Polish. And we think the nails are just as delicious as the cupcakes.
Ad Loading...
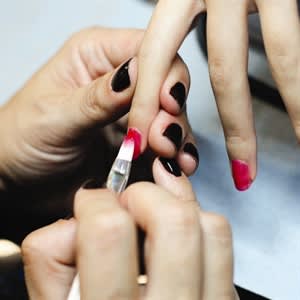
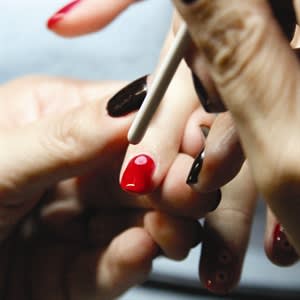
Using different-sized points (brush handles and paper clips) Elaine came up with an interesting technique for creating simple gel nail art using soak-off gels.
Here’s how you can do these nails:
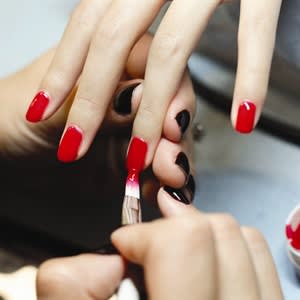
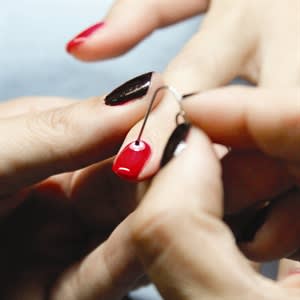
1. Prep the nails. Apply a coat of Basecoat Gel and cure for 30 seconds. Apply Star Nail’s Eco Soak Off UV Gel Polish in Garden of Eden Red to the nails. Cure in a UV light for two minutes.
2. Apply another coat of Garden of Eden Red to the nails and cure for two minutes.
3. To make the color dots, first apply Flamingo Pink. (This should be your biggest dot.) To do this, use the end of a large brush handle dipped into the gel and press it onto the nail. It leaves a perfect circle.
Ad Loading...
4. While Flamingo is still wet, use the end of a smaller brush handle dipped in white for the next dot. Be careful when you pull your handle away from the white. Make sure the “gel string” falls centered and doesn’t flop over your Flamingo Pink or Red.
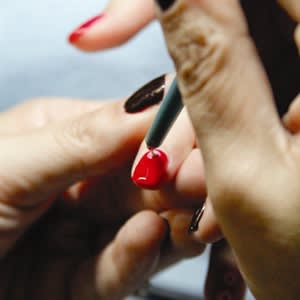
5. Lastly, while the other two gel dots are still wet, dip a paper clip tip into Golden Aubergine and leave a tiny center dot. Again, be careful not to let the gel string flop.
6. Now cure this for three minutes in the UV Lamp. Be sure the dots are not too thick or you’ll need to cure much longer. Use Finishing Wipe to remove the sticky layer from all of the nails. Apply Eco Sealer.
Marine-exclusive antioxidants act as a natural biological shield for the feet to help protect skin, smooth cracks, hydrate roughness, calm inflammation and disrupt bacterial and fungal activity, leaving feet feeling softer, smoother, more hydrated and healthier.
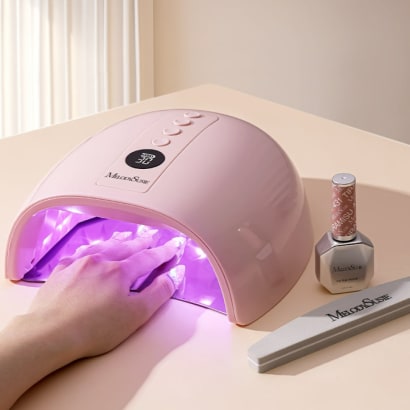
The MelodySusie P-PLUS30GT UV/LED Rechargeable Nail Lamp represents an upgrade in curing technology, designed to address several challenges through improved light reflection, intelligent heat management, and cordless operation.
Elevate your tip service with the OPI GELevate™ Extension System, featuring tailor-made Soft Gel Tips, GELevate 4-in-1 Builder with Intelli-Builder Technology and the Lightening Flash Cure Gel Lamp. This new system from OPI allows for flawless tips in no time.
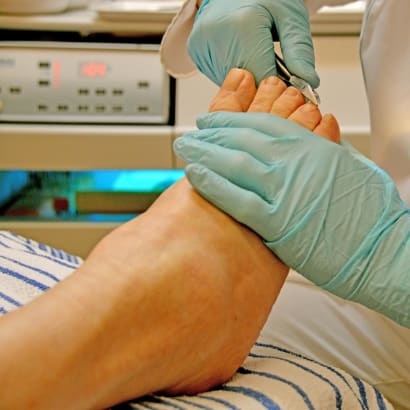
Nail technicians are embracing the Medical Pedicure as a service and placing it on their menus. But what is it? What training is required? Is it within our scope of practice as licensed nail technicians?
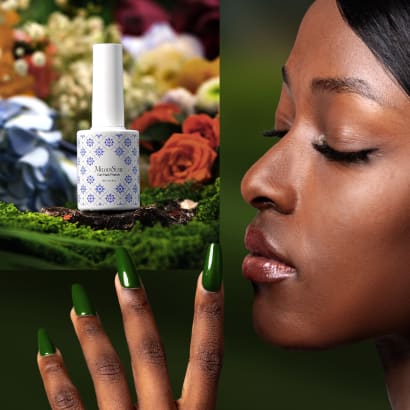
MelodySusie introduces the Fleurwee Gel Nail Polish series—a revolutionary gel polish that is HEMA/HPMA- and TPO-free, plant-based gel polish for a high-quality nail care experience.
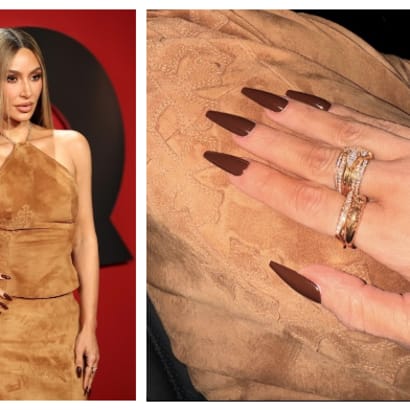
Kim Kardashian's manicure created for GQ’s annual 'Man Of The Year' event are the perfect understated, yet edgy look for fall or even the holiday party season.
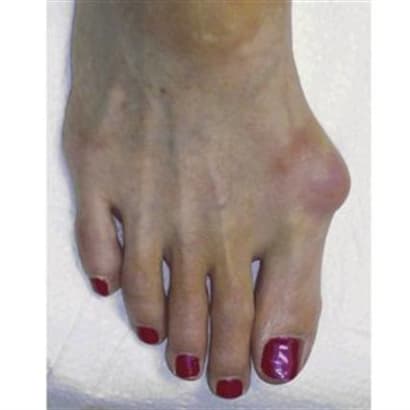
When the weight of the body lands on a swollen nerve, it can be debilitating. Learn the symptoms and alert clients to this common problem that develops in the nerves of the foot.
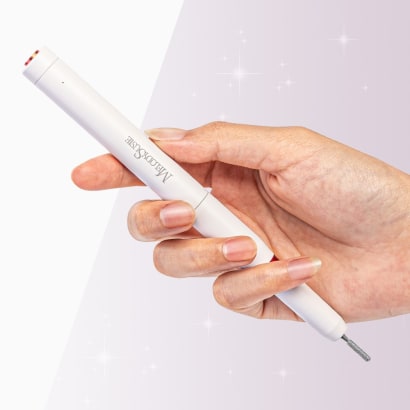
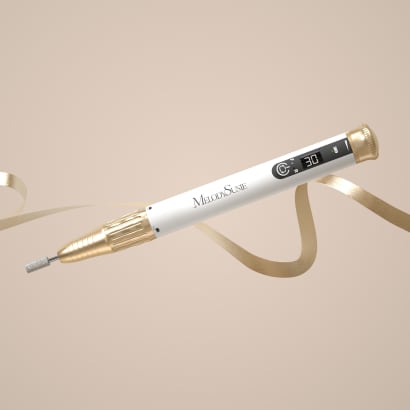
With the PC1 Nail Drill Pen, achieving healthy nails and a flawless manicure has never been easier. This user-friendly nail drill pen covers all your nail care needs.
Attending a presentation by Doug Schoon is an opportunity not to be missed for anyone in the nail care industry. His extensive expertise, commitment to accurate information, and engaging presentation style make for an enlightening experience.