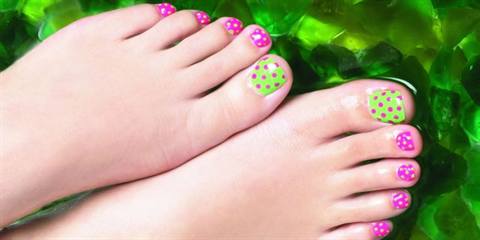
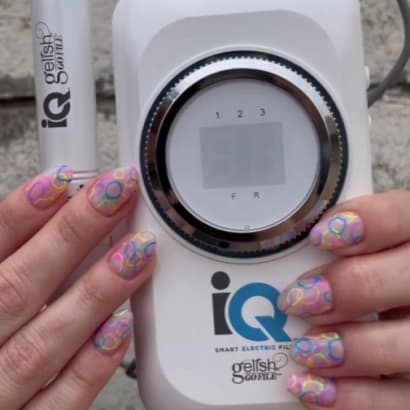
One of the hottest trends sweeping the feet industry is gel toes. Risé Carter, national director of sales and education for NSI, did these polka dot gel toes for our May ’08 cover.
One of the hottest trends sweeping the feet industry is gel toes. Risé Carter, national director of sales and education for NSI did these polka dot gel toes for our May ’08 cover.
Risé is a frequent contributor to NAILS, and has co-authored an extensive 137-page Educational Manual used by NSI distributors and educators in more than 60 countries. She also was the artistic and creative director behind NSI’s “Beyond the Basics” DVD, and has confessed that she has a natural ability for educating others.
Ad Loading...
“I can break down complicated science into easy-to-understand information,” she says, “and then show techs how to troubleshoot their own problems.”
This design is quite simple and the polka dots add an elegant touch to the solid nail color.
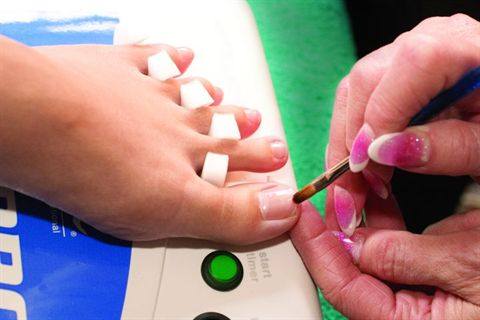
1. Perform a pedicure as you normally would.
2. Prep the toenails on one foot.
3. Apply a thin coat of Balance One-Step Clear as a base coat. (You do this so the pigment of the colored gels doesn’t penetrate and stain the natural nails. It also helps the gel come off more easily when it comes time to remove them.)
Ad Loading...
4. Cure for 90 seconds in the UV lamp. Wipe tacky layer off lightly saturated with Cleanse.
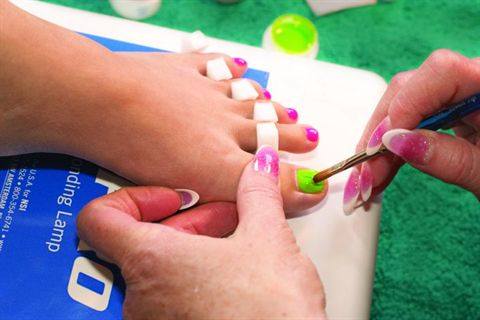
5. Apply one coat of Balance Color Gel. (For this shoot, Risé used a custom-blended green for the big toes and Hot Pink on the rest of the toes.) Cure for two minutes. Leave the tacky layer.
6. Apply a second coat and cure for two more minutes. Remove tacky layer with Cleanse.
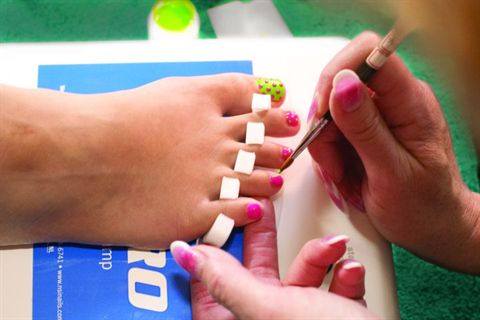
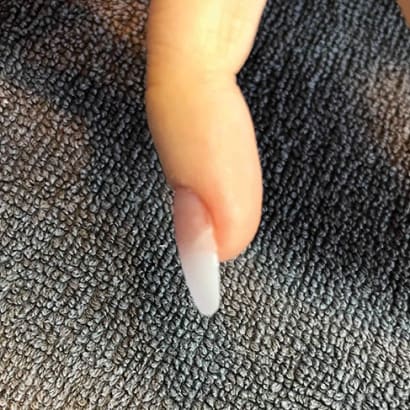
7. Use a small tapered brush to apply polka-dots to the big toe and freeze the dots for 10 seconds.
8. Apply dots to smaller toes two at a time and lock for 10 seconds at a time.
Ad Loading...
9. Apply a thin coat of Builder Clear. Cure for 90 seconds. Buff it lightly to smooth it out.
10. Remove the dust and apply a layer of Glaze N Go. Cure for 90 seconds. There is no tacky layer to remove.
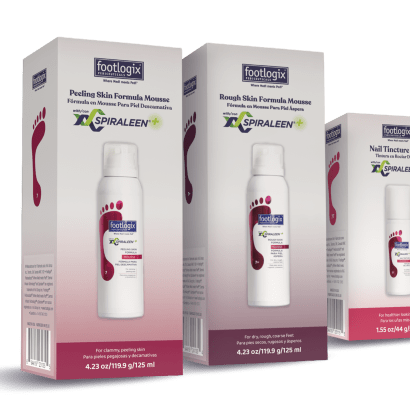
Marine-exclusive antioxidants act as a natural biological shield for the feet to help protect skin, smooth cracks, hydrate roughness, calm inflammation and disrupt bacterial and fungal activity, leaving feet feeling softer, smoother, more hydrated and healthier.
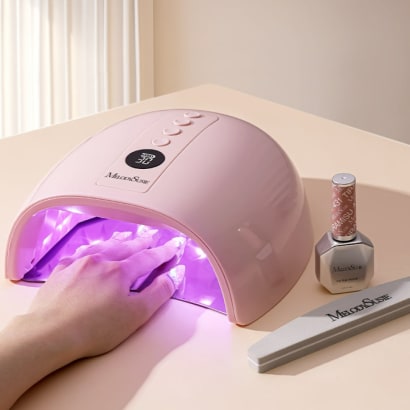
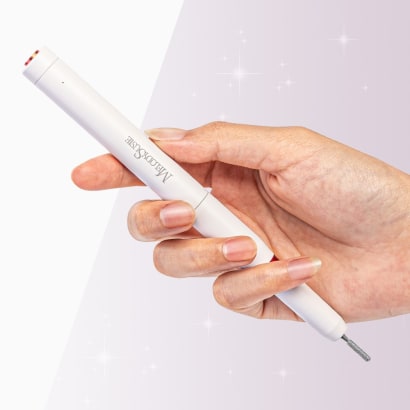
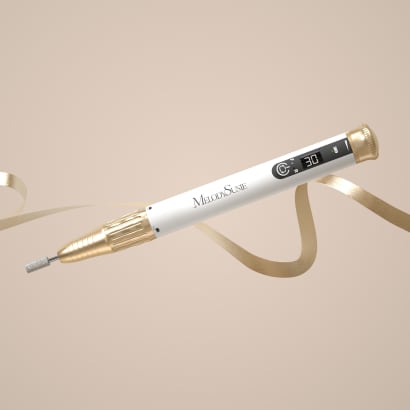
The MelodySusie P-PLUS30GT UV/LED Rechargeable Nail Lamp represents an upgrade in curing technology, designed to address several challenges through improved light reflection, intelligent heat management, and cordless operation.
Elevate your tip service with the OPI GELevate™ Extension System, featuring tailor-made Soft Gel Tips, GELevate 4-in-1 Builder with Intelli-Builder Technology and the Lightening Flash Cure Gel Lamp. This new system from OPI allows for flawless tips in no time.
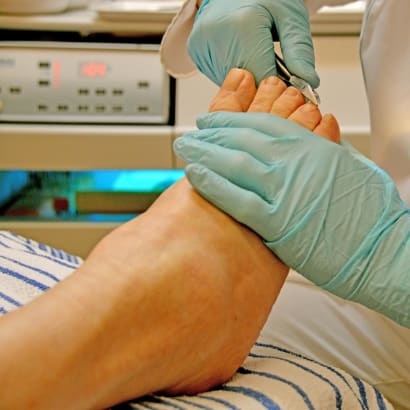
Nail technicians are embracing the Medical Pedicure as a service and placing it on their menus. But what is it? What training is required? Is it within our scope of practice as licensed nail technicians?
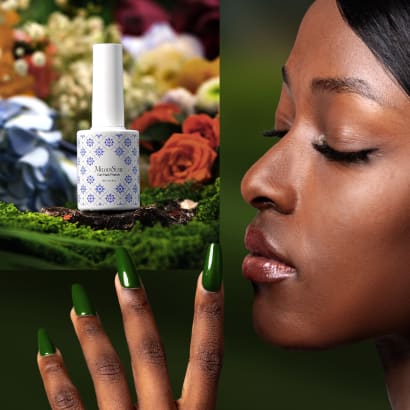
MelodySusie introduces the Fleurwee Gel Nail Polish series—a revolutionary gel polish that is HEMA/HPMA- and TPO-free, plant-based gel polish for a high-quality nail care experience.
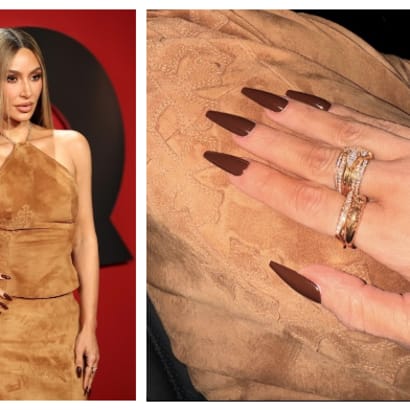
Kim Kardashian's manicure created for GQ’s annual 'Man Of The Year' event are the perfect understated, yet edgy look for fall or even the holiday party season.
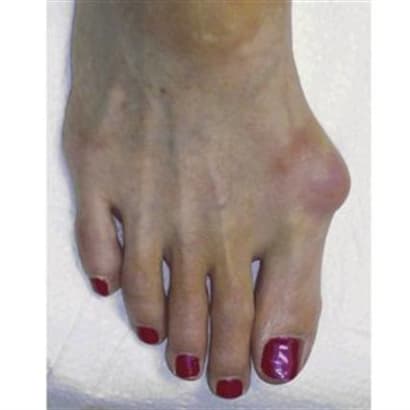
When the weight of the body lands on a swollen nerve, it can be debilitating. Learn the symptoms and alert clients to this common problem that develops in the nerves of the foot.
With the PC1 Nail Drill Pen, achieving healthy nails and a flawless manicure has never been easier. This user-friendly nail drill pen covers all your nail care needs.
Attending a presentation by Doug Schoon is an opportunity not to be missed for anyone in the nail care industry. His extensive expertise, commitment to accurate information, and engaging presentation style make for an enlightening experience.