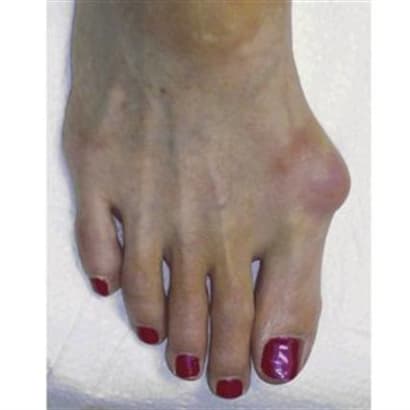
Excessively short and damaged toenails can be completely changed with acrylic toenail enhancements.
by Staff
December 1, 2008
2 min to read
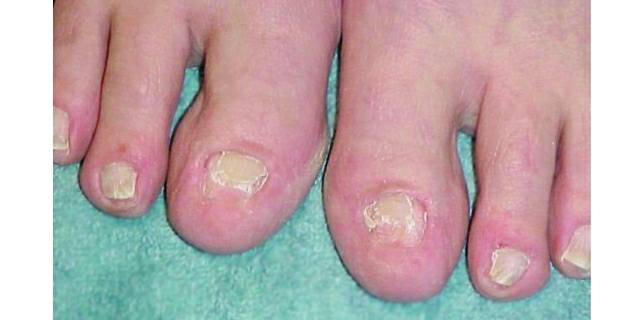
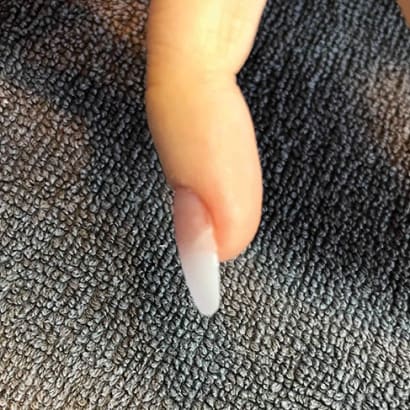
Many people suffer from excessively short and damaged toenails, hiding them by avoiding sandals, beaches, and other enjoyable barefoot ctivities. But a quick toenail enhancement can completely change their outlook on baring their soles, so to speak. Candy Corbin of New Refl ection Salon in Moore, Okla., shares how she creates acrylic toenail enhancements on damaged toenails.
Remember to not soak feet in water or do a “wet pedicure” prior to rebuilding the nails. This ensures the area is not saturated with water for your acrylic service. If a pedicure is requested it can be done after the nails have been rebuilt, shaped, and buffed.
Ad Loading...
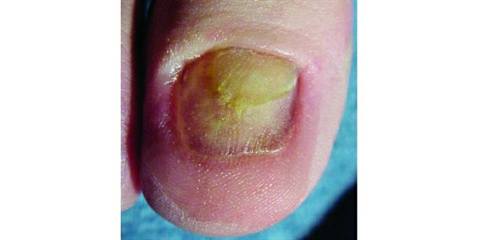
1. Cleanse feet with a sanitizing product and perform a visual inspection to check for signs of infection. Remember often damaged nails are free from infection but appear thick and flaky. If you are ever in doubt, refer your client to a physician to rule out possible infections before performing this service. Once the doctor gives the go ahead, you are free to provide services to your client.
2. Carefully thin the nail to reduce upward growth, making sure to not file through the nail plate. Prep the nail for an acrylic application
3. Use a medium to dry bead of acrylic to recreate a nail plate. The natural nail bed will be your guide, be sure to keep the acrylic thin over the natural nail as you will be building your enhancement over this newly created nail plate.
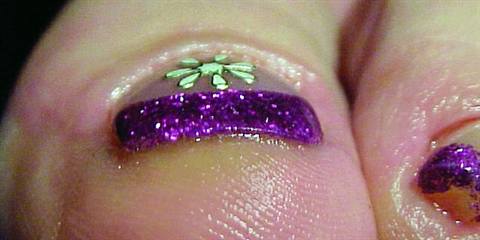
4. Build the enhancement with clear acrylic for a polish-ready nail, or you can use pink-and-white or colored acrylic as well. Be sure not to build an overly thick enhancement. Thick enhancements may cause discomfort when your clients wear closed-toe shoes.
5. Carefully file and shape the finished nail as usual, being careful to not be overly aggressive. Slightly rounded corners are preferable because they are less likely to snag and pry the nail loose.
Ad Loading...
6. Finish the nails with polish, gel, or a pedicure if desired. Your finished nail should have a thin profile at the edges with a smooth transition to ensure the nail does not snag during routine activity. The final nail should have a slightly rounded arch and take the appearance of a natural toenail. Length should not extend past the toe.
Marine-exclusive antioxidants act as a natural biological shield for the feet to help protect skin, smooth cracks, hydrate roughness, calm inflammation and disrupt bacterial and fungal activity, leaving feet feeling softer, smoother, more hydrated and healthier.
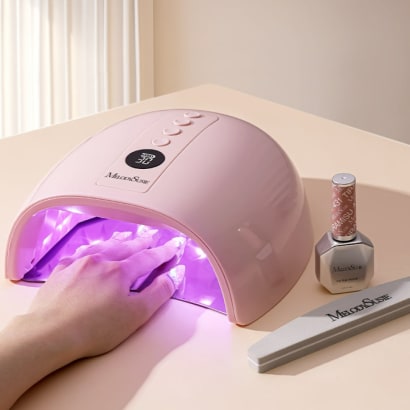
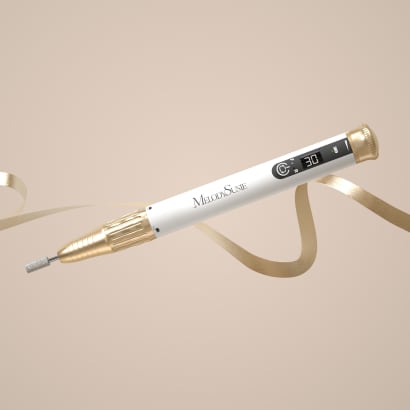
The MelodySusie P-PLUS30GT UV/LED Rechargeable Nail Lamp represents an upgrade in curing technology, designed to address several challenges through improved light reflection, intelligent heat management, and cordless operation.
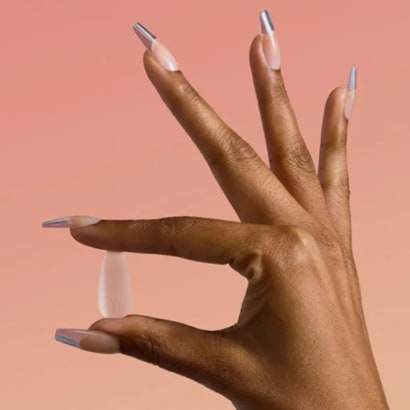
Elevate your tip service with the OPI GELevate™ Extension System, featuring tailor-made Soft Gel Tips, GELevate 4-in-1 Builder with Intelli-Builder Technology and the Lightening Flash Cure Gel Lamp. This new system from OPI allows for flawless tips in no time.
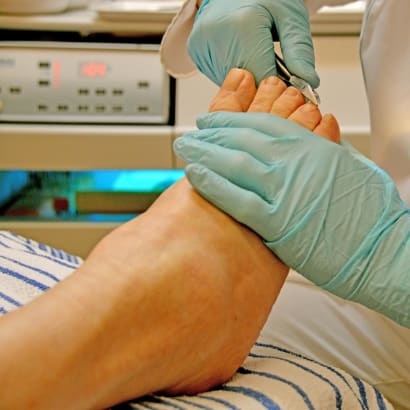
Nail technicians are embracing the Medical Pedicure as a service and placing it on their menus. But what is it? What training is required? Is it within our scope of practice as licensed nail technicians?
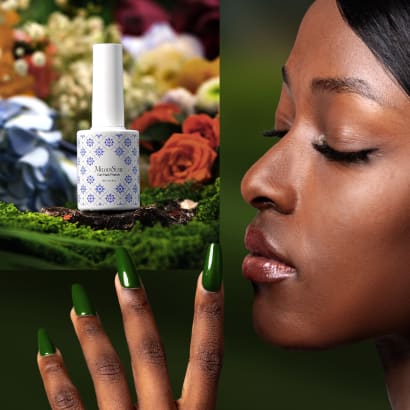
MelodySusie introduces the Fleurwee Gel Nail Polish series—a revolutionary gel polish that is HEMA/HPMA- and TPO-free, plant-based gel polish for a high-quality nail care experience.
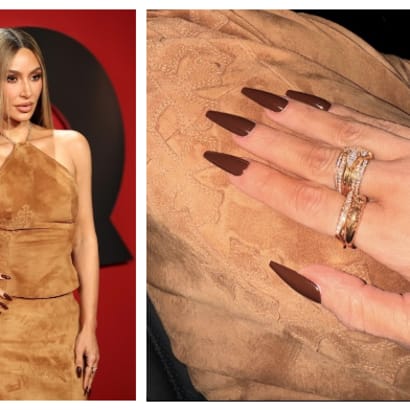
Kim Kardashian's manicure created for GQ’s annual 'Man Of The Year' event are the perfect understated, yet edgy look for fall or even the holiday party season.
When the weight of the body lands on a swollen nerve, it can be debilitating. Learn the symptoms and alert clients to this common problem that develops in the nerves of the foot.
With the PC1 Nail Drill Pen, achieving healthy nails and a flawless manicure has never been easier. This user-friendly nail drill pen covers all your nail care needs.
Attending a presentation by Doug Schoon is an opportunity not to be missed for anyone in the nail care industry. His extensive expertise, commitment to accurate information, and engaging presentation style make for an enlightening experience.