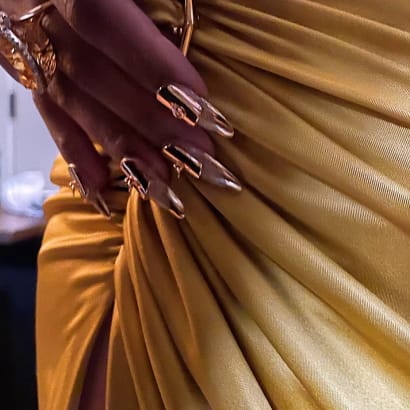
OPI’s NEW Chrome Effects and Infinite Shine Glaze Toppers
After seasons of barely-there manicures and minimalist nail looks, chrome is officially back in the spotlight.
by Staff

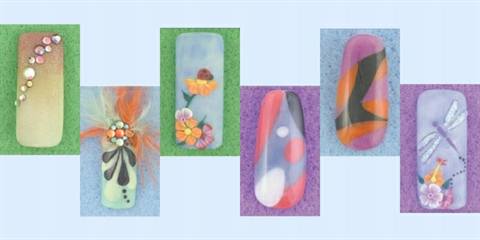
Colored acrylic powder is as versatile a medium as nail art paint, if not more so. From incredibly detailed designs to abstract stylings, the nail art possibilities are limitless. In the first part of a two-part series meant to illustrate the versatility of colored acrylic and showcase the talent of nail techs, we start you off with a few designs to experiment with.

Colored acrylic is keeping pace with pedicures and gel enhancements as one of the fastest-growing services in the country. And why wouldn’t it be? There are as many uses for the stuff as there are colors available on the market.
It can be used to sculpt permanent nail art that demands a higher price, it can be custom-blended to create any color under the sun, it can be used to enhance traditional pink-and-white acrylic to better suit a client’s skin tone or cover up discoloration, and it can be used instead of polish over a client’s natural nails, just to name a few.
And with so many manufacturers churning the stuff out in a variety of color palettes from saturated primary colors to sheers and metallics, there is no shortage of formulations to experiment with.
Designs can range from simple stripes or dots to intricate floral scenes. It may take some time to learn the subtleties of technique — working with pigmented powders is a little different than your normal pink-and-whites — but with practice, you should be up and running in no time. Use these designs to start off with and we’ll be offering more advanced designs in a future issue.
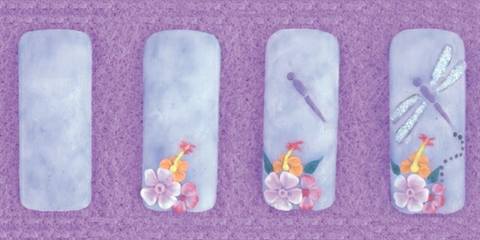
Elaine Watson, director of education for Star Nail Products, brings a painterly approach to colored acrylic with this whimsical design. Notice the shading of the flowers.
1. Lay down a thin sky blue coat of acrylic, allowing the white of the tip to peek through, creating the illusion of clouds. Instead of trying to spread one large ball of acrylic across the entire tip, opt instead for a few smaller balls that will give you the motley, uneven look you need.
2. In the lower left corner create one large flower surrounded by two smaller flowers. To create the two-toned effect, pick up two colors of acrylic on the same ball.
3. Add leaves and the body of a dragonfly. To create the leaves, place a ball of green acrylic, drag it with the very tip of your brush, and crease it with the length of your brush.
4. Finish with glittery wings and tiny black acrylic dots extending from the flowers to the dragonfly.
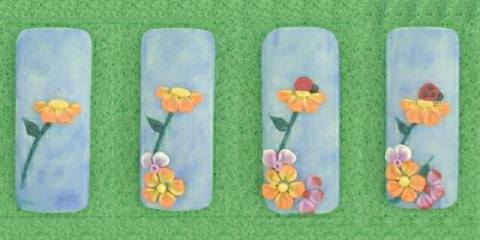
Watson gets cute, creating this little ladybug with a series of beads of acrylic. Practice picking up beads of various sizes in order to master this design.
1. Lay down a sky blue background. Create a single flower, overlapping the petals to create a sense of depth. The two outer petals should be smaller than the two in the center.
2. Add a second and third flower at the base of the stem.
3. Create a ladybug sitting on the top of the first flower. Add a third flower at the base of the design.
4. Add petals and polka dots to the design.

This design created by John Hauk, renowned competitor and OPI’s technical advisor, makes use of three solid colors and straight lines. Practice making lines crisp in order to master this technique.
1. Lay in your lightest color first. Pat down each ball of acrylic using the tip of your brush to clean up all the edges.
2. Lay in your second color, leaving the darkest color for last. Make sure not to blur the two colors where they meet.
3. Lay in your darkest color. Be careful not to overlap this final color too much. Cap with clear acrylic and buff to a high shine.
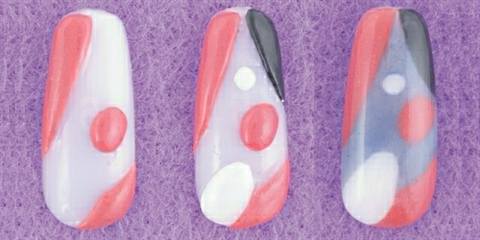
Hauk explores the softer side of abstract art in this design where circles and curves dominate the nail.
1. Lay in a color, carving out space to allow other colors to fit in puzzle-like.
2. Lay in the next two colors, being careful to keep shapes crisp.
3. Fill in the spaces between shapes with the final color. Cap entire nail with clear acrylic and buff to a high shine.
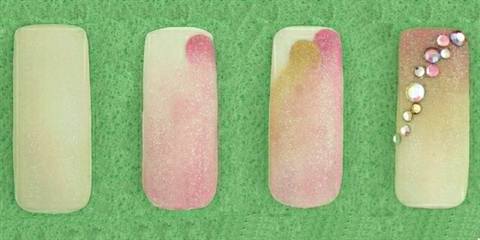
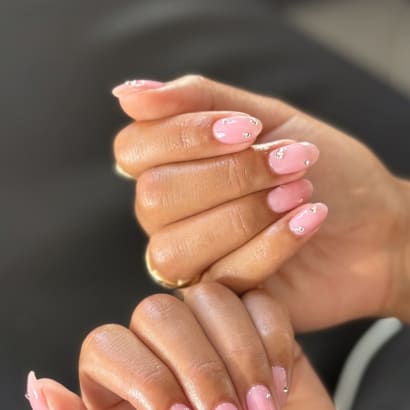
Colored acrylic doesn’t always have to scream. It can play second fiddle to a dribbling of rhinestones just fine, thank you. Here Mae Ling Parrish, an EZ Flow educator, blends two subtle shades to highlight a flirty rhinestone design.
1. Lay down a thin coat of frosty white over the entire nail. Stroke it evenly across the tip, making sure there are no bumps or dips.
2. Blend a soft shimmery rose over the top of the white. It may be helpful to work a little more wet than usual, depending on the system you are using.
3. Blend a coppery gold into the rose. Make sure there are no clear lines of demarcation between the two colors.
4. Lay down pink and gold rhinestones diagonally across the nail. Here pink stones and clear stones were used to mimic the fade underneath.
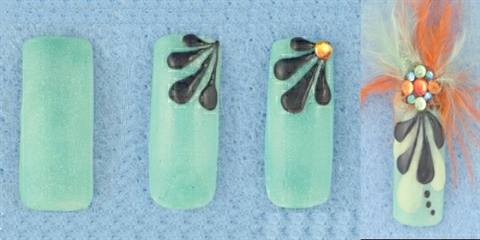
Designed more for a special event, this Mardi Gras design created by Mary Seitzinger, an educator for EZ Flow, comes with its own party attire.
1. Lay down shimmery green over the entire nail. Stroke it evenly across the tip, making sure there are no bumps or dips.
2. Create dramatic black plumes extending out of the upper right side of the free edge.
3. Complete with a complementary orange rhinestone.
4. For more daring clients, embellish the design with lime green plumes, black dots, a cluster of rhinestones, and feathers for good measure.
After seasons of barely-there manicures and minimalist nail looks, chrome is officially back in the spotlight.

For years, press-on nails have been treated as the alternative to professional services. But the category has evolved and so has the client.
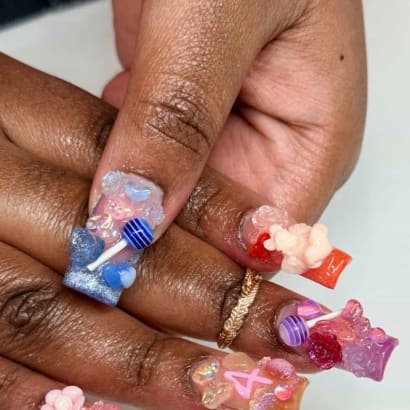
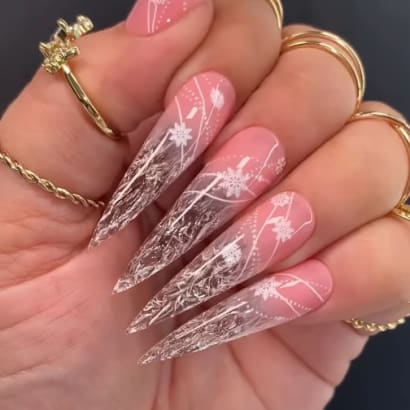
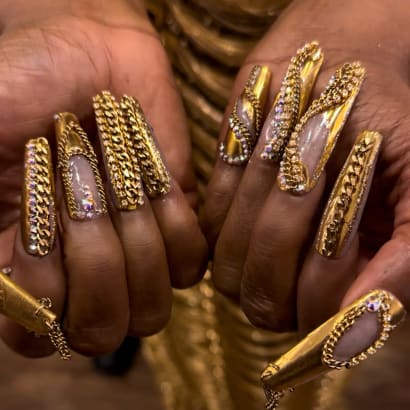
Junk nails continue to steal the spotlight within the professional beauty industry.
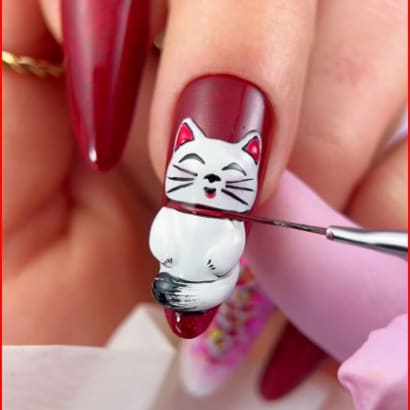
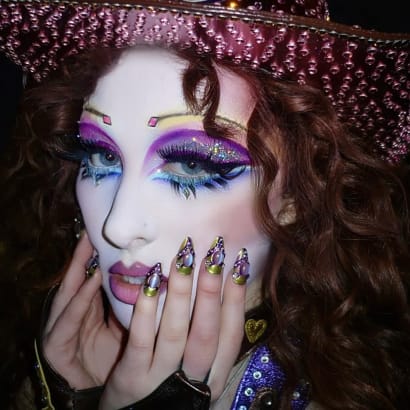
The lucky cat in this design signifies fortune and abundance--yes, please!
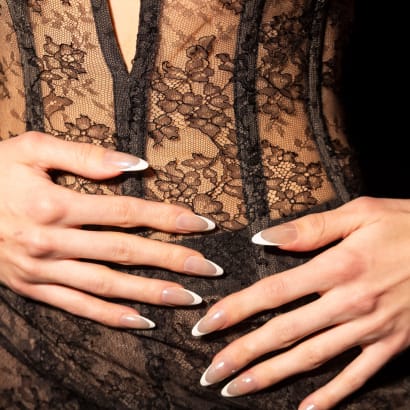
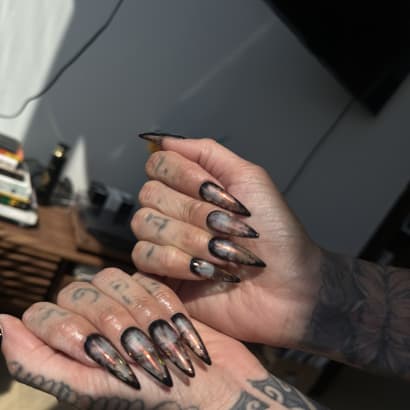
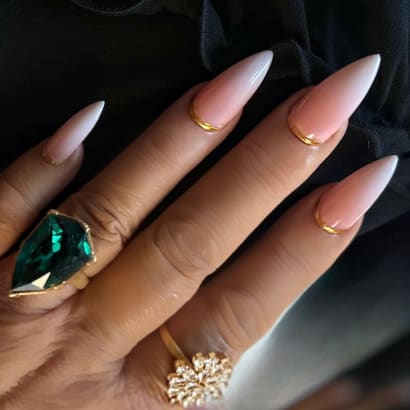
“You can’t go wrong with a classic French elevated with a high-shine, chrome finish that’s continuing to trend. The stiletto shape of the nails echoes the precision and structure seen throughout the collection.”
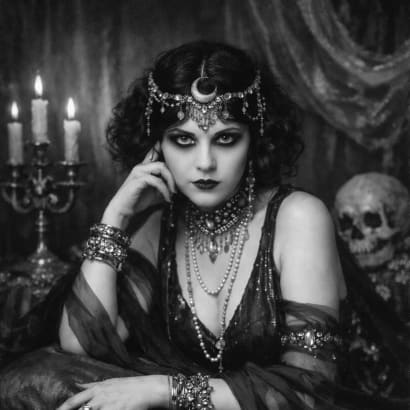
Romantic goth hairstyles are trending for 2026, and these Sebastian Professional artists have long anticipated the look.
Check out what beautiful looks these celebrity nail artists cooked up for famous attendees and nominees of the 2026 Grammy Awards.
Check out these beautiful holiday and winter nails, created by the talented nail artists of our MODERN SALON 100 of 2025. Top-tier inspiration!
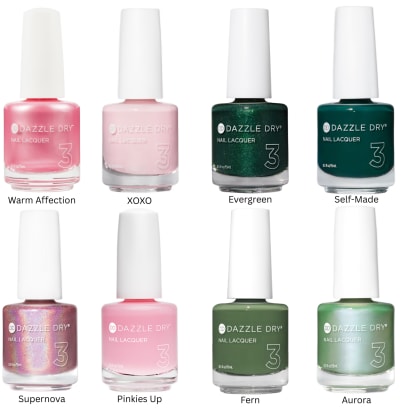
In anticipation of Wicked: For Good, here are some stunning pink and green polishes from clean nail brand Dazzle Dry.
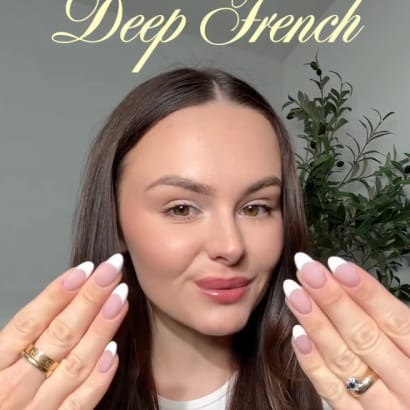
The return of the deep French is a trend with staying power.
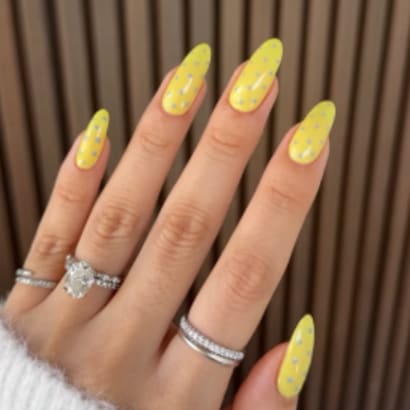
OPI Global Ambassador and celebrity manicurist Zola Ganzorigt just merged two of summer’s most buzzy trends – butter yellow and polka dot nails -- to create this adorably sunny trend on Hailey Bieber.
Our favorite part of any award show or celebrity event is seeing what those celebrities are wearing on their fingertips! These celebrity manicurists shared how to recreate some of our favorites.
The stars at the 2025 Oscars and their talented manicurists did not disappoint, and we've chosen a few of our favorite nail looks to share with you.
See some of the most decorated fingertips at the Grammys, created with Aprés Nail.
Looking for some new stuff to get excited over during this post-holiday quiet period? We've got just the selection for you, including new polish formulas, colors, and even botanical skincare.
Which of our 2024 nailsmag.com articles did you find most intriguing last year? The results are in!
See how these celebrity manicurists used Aprés Nail to create some of the Golden Globes' most stunning nail looks.