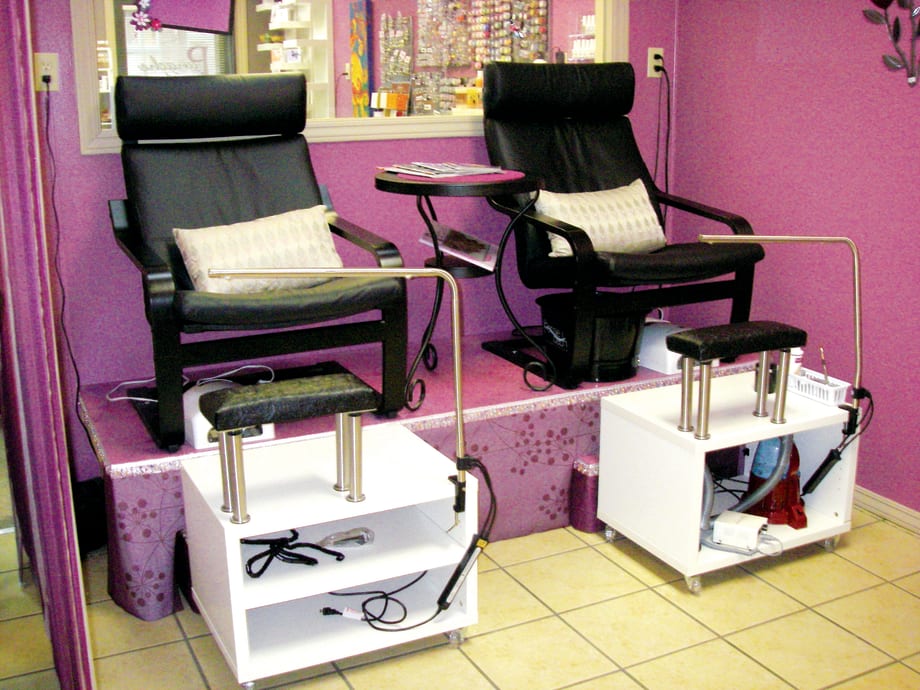
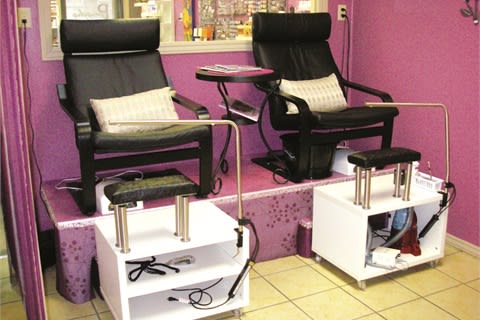
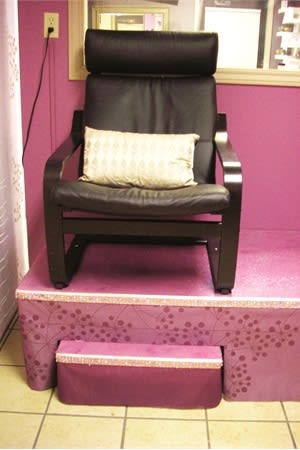
Elevating clients for feet-focused services generally improves nail tech ergonomics, as you don’t have to hunch over to do close-up work. And building your own set-up means you can design and decorate it however you want. (Hello, purple paint and glitter!)
by Candice Everest
July 13, 2012
4 min to read
For over a year, I tried to come up with a better pedicure station. The 21” platforms I originally used worked great for getting my clients’ feet up higher for me to work on, but not everyone had an easy time with the two steps. Plus when someone sat at the front of the chair to put their shoes on, the chair had a tendency to rock forward. I finally came up with a solution that is easier for clients, keeps their feet high enough, and accommodates both my FootsieBath pedicure basins and gel toe services. One long weekend later and with the building skills of my husband, the new pedicure platform was complete. I absolutely love the new set-up. Here’s how we built it.
Next page: What You'll Need
Ad Loading...
[PAGEBREAK]
FOR THE PLATFORM AND STEPS:
Materials: > (1) 4’x8’ sheet of 3/4” interior grade plywood > (2) 8’ lengths of 4”x4” posts > (6) 8’ 2”x4” boards > 1 box of 3” deck screws > 1 box of 1 ½” deck screws > 1 quart paint > (optional) glitter > 24-oz. Mod Podge (two coats) > 144”x 17.5” fabric for skirting for platform > 168” x 9” fabric for skirting for steps > 9 yards wide stiff ribbon for platform and steps > (optional) 9 yards beaded fringe > felt pads for under the legs
Next page: Step-by-step instructions [PAGEBREAK]STEP-BY-STEPS
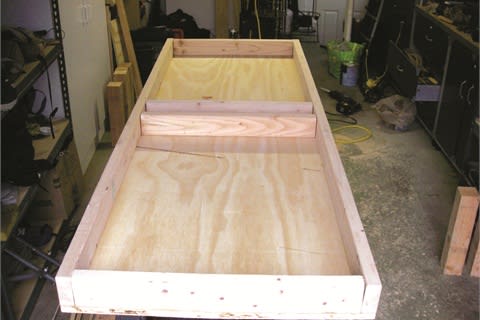
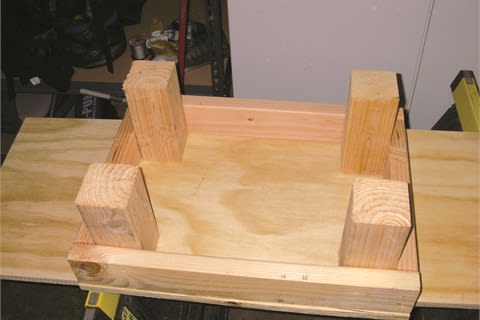
CUT LUMBER TO SIZE 1. Plywood: Cut (1) 30”x84” piece for the platform and (2) 18”x24” pieces for the steps. 2. 4x4’s: Cut (6) 16.625” legs for the platform and (8) 8.25” legs for the steps. 3. 2x4’s: Cut (2) 84” lengths and (4) 26.5” lengths for the platform and (4) 24” lengths and (4) 14.5” lengths for the steps.
Ad Loading...
BUILD THE PLATFORM AND TWO STEPS
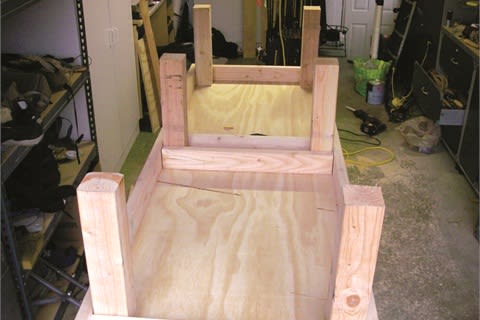
1. Assemble the 2x4’s by laying out the long boards with the four short boards between them. Space the two center 2x4’s so that the 4x4 legs can be screwed in between them. Assemble the frame with 3” deck screws. Once the frame is assembled, screw the platform top to the frame using 1 ½” deck screws.
2. Position the 16.625” 4x4 legs and screw them in place through the adjacent 2x4’s using four screws per leg.
3. Assemble the steps in the same manner, using (2) 24” 2x4’s and (2) 14.5” 2x4’s for each step, and secure the legs in the corners through the platform surface as well as through the 2x4’s.
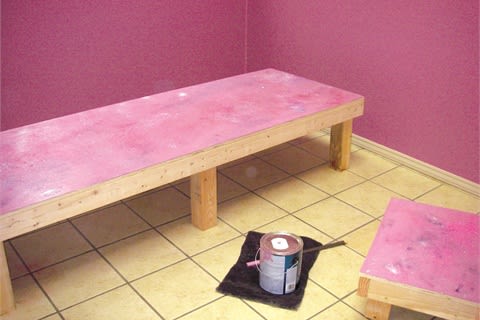
4. Paint the top surface of the platform and the steps. Paint the second coat and optionally sprinkle the glitters of your choice into the wet paint. Seal with two coats of Mod Podge.
Ad Loading...
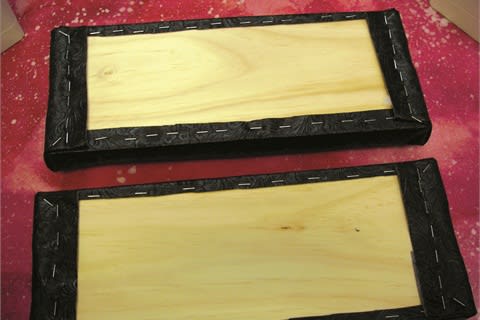
5. Staple fabric for skirting to the platform (wrapping around the sides) and the two steps (covering all four sides). Leave a slight gap at the top of the fabric, which will be covered by the ribbon, so that no fabric will peek out at the top.
6. Staple a wide ribbon across the top of the front of the platform, flush with the top surface to create a clean edge. Be sure to use a stiff ribbon so it won’t sag. Staple beaded fringe (if using) over the ribbon.
BUILD THE TWO FOOT CARTS (Instructions below are for one cart. Repeat to create the second cart.)
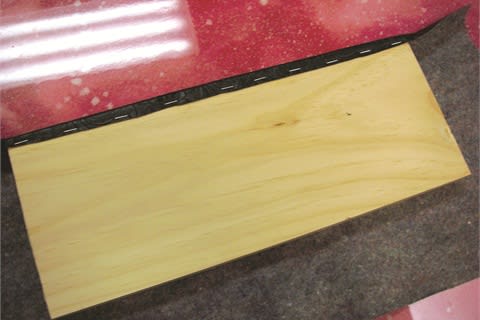
7. Staple leather to one side of a 1”x6”x14” board.
8. Use spray adhesive to attach the 2”x6”x14” foam to the top side of the board.
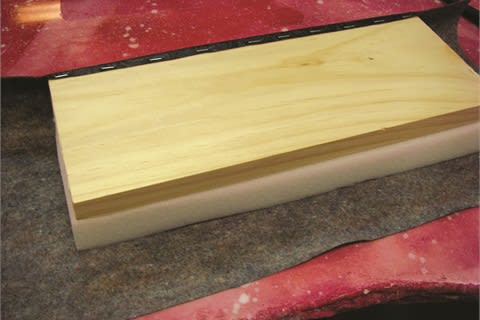
9. Close the foam within the leather, then staple the leather along the second side. Fold and staple the ends.
Ad Loading...
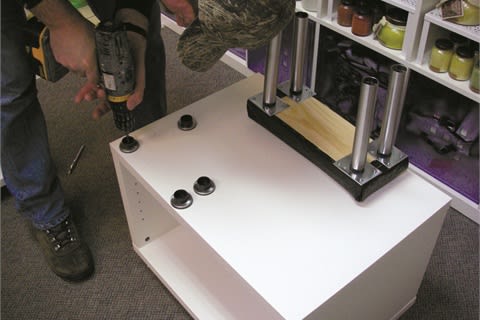
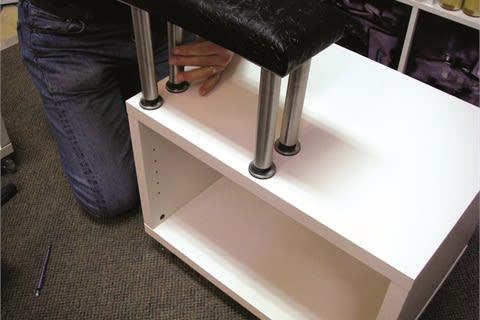
10. Attach four IKEA cabinet legs to the bottom of the leather-topped board. Drill holes through the cabinet leg foot base and the nightstand, attach the footbase to the nightstand with machine screws.
11. Attach the bottom leg inserts into an IKEA Odda nightstand.
PUT IT ALL TOGETHER
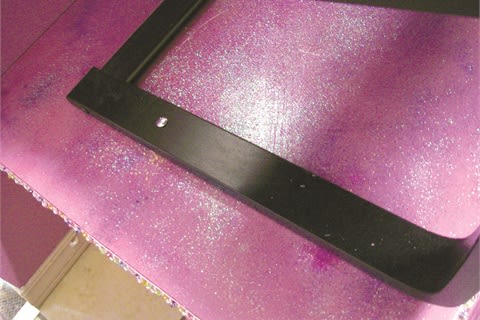
12. Position the IKEA Poäng chairs, hold them firmly in place and drill through the base and the platform surface. Use 3” carriage bolts and washers to secure the chairs in place so they don’t tip over.
13. Use scissors to slit the skirt to allow the steps to be pushed under the platform. Use your finished set-up with FootsieBath pedicure basins and a UV light, which can be placed on the empty part of the foot rest cart. The light and FootsieBath will fit side by side under the chairs so that you can switch them out if doing gel toes with a pedicure.
Square data shows that regular customers tip 11% higher and are shared across 32% of businesses in the same ZIP code, driving thousands of dollars in additional revenue per connection.
When Bowie Lau and Jeffrey Ching opened JBW Jeffrey Ching Salon in 2011, they weren’t just launching another luxury hair destination—they were building a business rooted in passion, artistry, and thoughtful growth.
Inside the Systems That Power an Elevated Salon Experience
From seamless online booking to a team-first culture, J Gold Salon in Atlanta offers more than great hair—it delivers consistent, high-touch service with the help of partners like Boulevard and American Express.
Want to grow your career as a beauty professional? K18 Sales Manager Sabrina Sanborn shares advice on networking, mentorship, and self-advocacy—from attending hair shows to finding the right guidance to reach your goals.
A combination of clear policies, effective communication, and strong client relationships has helped me create a more reliable and efficient booking system.
Founded by Cleveland serial entrepreneur Shaura Rodgers, Nailtorious has grown to include a nail supply megastore, training facilities, and retail line for nail techs.
This period after the holidays can bring on a huge lull for hairstylists. We asked Cosmo Prof's team of professionals to offer their best advice on how to deal with the January-February slow period.
Key highlights include a push toward inclusive spaces for all abilities, an emphasis on maximizing livable square footage, and a continued love for modern farmhouse exteriors.
The busy holiday season is here, and with it comes jam-packed days, last-minute client requests and booming retail sales. For many salon owners, the highlight of the season is Small Business Saturday® (SBS). This year on Saturday, November 30, consumers can take their shopping into the small businesses in their communities.
Want to become savvy about your personal finances, but don't quite know where to start? Anna Manukyan identifies six important concepts for building a strong financial foundation.
Salon owner Nuri Yurt had a dream of owning a salon on New York City’s Madison Avenue. "Through perseverance, hard work and stellar customer service, he and partner John Kaygisiz founded Toka Salon in 2007.
Vagaro has consistently been at the forefront of salon software technology, helping businesses be more efficient, create more effective communication, and even improve company culture. Now, Connect by Vagaro, the platform’s two-way communication capability, and Vagaro’s new generative AI tools are giving owners new opportunities to grow and expand.
This list of watch-outs from @jodydoesjels prompted us to reach out to her and learn more. We had already fallen for her hand-painted designs and now we wanted to know more about this list she created to help clients decide if she was the nail tech for them.
Education is necessary for beauty professionals to maintain their cosmetology licenses, and paying for that education can be burdensome, but it doesn't have to be. Understand which education tax credits can help you offset those costs.