Go from newcomer to successful YouTube content publisher by following these steps.
by Sarah Waite, Contributing Editor
September 25, 2018
4 min to read
YouTube has over one billion users and one billion hours watched per day. It’s an incredible resource for both learning and sharing. But for people new to content creation, uploading your first video can feel intimidating. Follow this timeline to take you from step one all the way to published content.
1. Intent
Congratulations! You’ve already completed the first step: deciding to make your own videos and start a channel.
Ad Loading...
2. Create Your Channel
Sign in to a Google account (required to use YouTube). Go to youtube.com/account and click the link on that page to create a new channel. We recommend using a brand account, which allows you to keep your channel information separated from your personal Google account.
3. Build Your Profile
Add a channel description, fill in your “about me” section, and add a cover photo. If you’re feeling really ambitious, you can also add a channel trailer, which is meant to show people what your YouTube is all about.
4. Have a Plan
Before you start filming, decide what kind of videos you want to provide. In the beginning, we suggest sticking to your strengths, so whether it’s a specific nail art technique or how to do an amazing gel fill, you know you’re sharing quality content.
Also, think about what kind of content you would find valuable as a viewer. Comparisons, swatches, and reviews are super popular on YouTube for a reason!
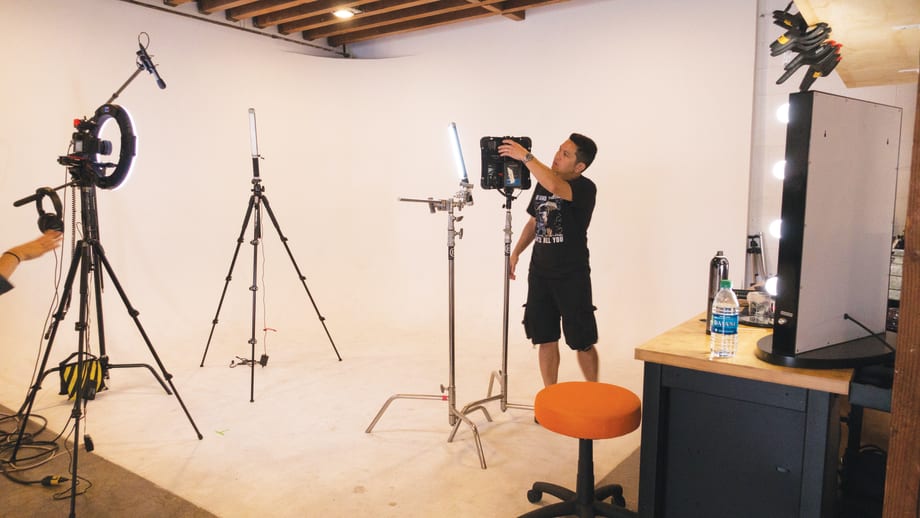
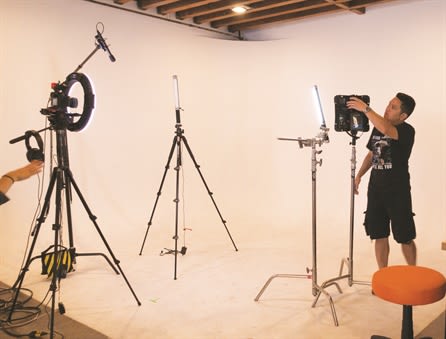
5. Lights… Camera…
When it comes to filming, it’s best to get plenty of raw footage. You can always edit it down later.
Ad Loading...
Our suggested filming setup looks like this:
DSLR with multi-point video autofocus or your smart phone
Tabletop tripod for your camera, or mounting system for your phone
Plenty of good, bright lighting, preferably coming in from multiple angles
Plain, non-distracting background. (If you struggle with focus in your videos, opt for something in a solid color instead of a patterned or glittery backdrop that can attract the focus.)
6. Time to Edit
Good news: You don’t need fancy software to edit your videos. Most basic edits can be made with the editing software that comes with your OS: iMovie for Apple products or Microsoft Photos (formerly Movie Maker) for Windows.
1. Load your footage into the program. 2. Drag and drop or select your clips to load them into the movie’s “timeline.” 3. Get rid of any extra, non-essential footage by trimming your clips. 4. Experiment with speeding up clips to help make your videos more digestible (we recommend 2x speed to start). 5. Crop your clips in closely so your viewers can see more clearly.
7. Polish it Up
These additions can turn your video from “meh” to “wow,” so don’t pass them up!
Ad Loading...
Voiceovers
Recording a voiceover after your movie is assembled lets you have more control over the finished product. Here are our tips:
Describe what you are doing in the video and clue the viewer into any helpful tips you may have.
Most computers have a built-in microphone you can use to record. If possible, do it in a quiet room; the fewer echoes there are, the better.
Speak clearly and with a friendly tone. Try smiling while you record to get the hang of it in the beginning.
Don’t forget to mute the audio from your original footage so only the voiceover can be heard.
Title cards and transitions
Use title cards to share your social handles, website address, video titles, and other important info.
Play with transitions between clips for a more professional-looking final product — we recommend fade to black, fade to white, and cross blur effects.
Music
Look for royalty-free music online to use alongside your videos.
The YouTube Audio Library is a built-in resource that offers hundreds of songs that you can download and legally use in any of your uploads.
8. Upload
1. On YouTube.com, click the video camera icon with a plus sign in it, then “Upload video.” 2. Click the big arrow button to select your file. 3. Title: Make it descriptive and keyword rich to help people find your videos. 4. Description: Include any additional details, links, or social media URLs. 5. Tags: Choose relevant keywords like nail polish, nail art, acrylic nails, beauty, tutorials, etc. 6. Make sure your video privacy is set to Public. 7. Click “Publish.”
Ad Loading...
9. Engage
Congratulations! Your video is now live. Hopefully, this will lead to viewers visiting your content and leaving comments. If they do, be sure to engage with them. Be open to constructive criticism, but don’t bother responding to trolls. Hit that block button instead.
Also consider engaging with the rest of the nail community on YouTube. Not only can you potentially get the benefit of networking with your peers, but they may also give your videos a watch in response.
10. Analyze
Use YouTube’s built-in analytics to monitor how your videos are performing and what is being received well by your viewers. You can use this information to plan your content moving forward.
Learn more about YouTube and social media on the whole at the first ever Salon Digital Summit, Nov. 4-6, in Los Angeles. For more information, visit www.salondigitalsummit.com.
Sarah Waite
NAILS’ social media columnist Sarah Waite is a licensed nail tech and the creator of the popular nail art website www.chalkboardnails.com. Follow her on Instagram @chalkboardnails.
Square data shows that regular customers tip 11% higher and are shared across 32% of businesses in the same ZIP code, driving thousands of dollars in additional revenue per connection.
When Bowie Lau and Jeffrey Ching opened JBW Jeffrey Ching Salon in 2011, they weren’t just launching another luxury hair destination—they were building a business rooted in passion, artistry, and thoughtful growth.
Inside the Systems That Power an Elevated Salon Experience
From seamless online booking to a team-first culture, J Gold Salon in Atlanta offers more than great hair—it delivers consistent, high-touch service with the help of partners like Boulevard and American Express.
Want to grow your career as a beauty professional? K18 Sales Manager Sabrina Sanborn shares advice on networking, mentorship, and self-advocacy—from attending hair shows to finding the right guidance to reach your goals.
A combination of clear policies, effective communication, and strong client relationships has helped me create a more reliable and efficient booking system.
Founded by Cleveland serial entrepreneur Shaura Rodgers, Nailtorious has grown to include a nail supply megastore, training facilities, and retail line for nail techs.
This period after the holidays can bring on a huge lull for hairstylists. We asked Cosmo Prof's team of professionals to offer their best advice on how to deal with the January-February slow period.
Key highlights include a push toward inclusive spaces for all abilities, an emphasis on maximizing livable square footage, and a continued love for modern farmhouse exteriors.
The busy holiday season is here, and with it comes jam-packed days, last-minute client requests and booming retail sales. For many salon owners, the highlight of the season is Small Business Saturday® (SBS). This year on Saturday, November 30, consumers can take their shopping into the small businesses in their communities.
Want to become savvy about your personal finances, but don't quite know where to start? Anna Manukyan identifies six important concepts for building a strong financial foundation.
Salon owner Nuri Yurt had a dream of owning a salon on New York City’s Madison Avenue. "Through perseverance, hard work and stellar customer service, he and partner John Kaygisiz founded Toka Salon in 2007.
Vagaro has consistently been at the forefront of salon software technology, helping businesses be more efficient, create more effective communication, and even improve company culture. Now, Connect by Vagaro, the platform’s two-way communication capability, and Vagaro’s new generative AI tools are giving owners new opportunities to grow and expand.
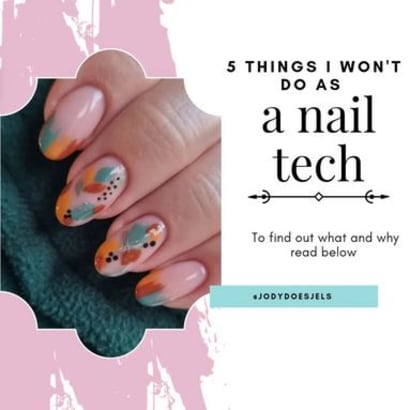
This list of watch-outs from @jodydoesjels prompted us to reach out to her and learn more. We had already fallen for her hand-painted designs and now we wanted to know more about this list she created to help clients decide if she was the nail tech for them.
Education is necessary for beauty professionals to maintain their cosmetology licenses, and paying for that education can be burdensome, but it doesn't have to be. Understand which education tax credits can help you offset those costs.