Improving the quality of your client photos is a great way to boost your business without having to spend any extra cash.
by Sarah Waite
June 5, 2017
Crop your photos so nails are seen easily.
3 min to read
Improving the quality of your client photos is a great way to boost your business without having to spend any extra cash. Take a look at your set up and processes, and ask yourself, “Am I really putting my best foot (or hand!) forward?”
You don’t have to be a professional photographer with a fancy camera to end up with great-looking nail photos. Spend a little time going over the tips in this DIY phone photo tutorial and see where your process can be improved. You work too hard perfecting your craft to let it fall flat in front of the lens!
Ad Loading...
Once you get your system perfected, you’ll be able to breeze through your client photos in no time. Here are some things to consider:
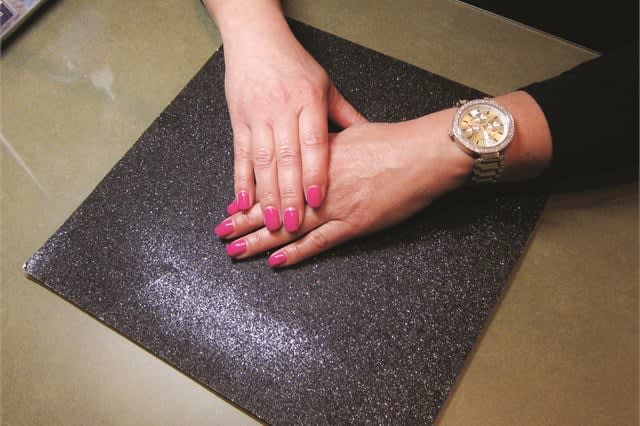
Keep your background handy in your desk. This is scrapbook paper.
Set the scene. While you could use your plain old table towel as a background, this is one area where you can easily (and inexpensively) give your shots some extra oomph. Play around with glittery scrapbook paper, fabric swatches, or even faux marble contact paper for a look that is both fun and functional.
Demonstrate the pose for your client first.
Strike a pose. While posing may seem normal to you, most clients are intimidated by the idea of hand modeling. Demonstrate the pose first with your own hands, and then don’t be afraid to get in there and adjust their fingers as needed. Ask your client to keep her fingers relaxed to avoid tense, “claw” style photos, and try a few different poses to see what looks best.
Adjust the angle of the light with your hand.
Light it up. Lighting can be the difference between a good photo and a great one. Make sure that the area you are taking the photo in has plenty of natural light or other lighting options. Aim for the look of natural light: Set up near a window or use a desk lamp with a bulb that mimics it. If you’re relying on a desk lamp, don’t be afraid to grab the lamp and physically move it around. Getting the angle right with a desk lamp can help minimize shadows and soften wrinkles in the final shot. And don’t forget to pay attention to the reflections of the light lines — sometimes they can obscure your nail art.
Ready your device. Before you start snapping pics, make sure your phone is set up for success. First, check that your lens is clear of oils from your fingers, as they can give your photo a soft, unfocused look (think ’80s glamour portraits). Turn off your flash to avoid harsh, blown-out photos. Position your phone far enough away that the autofocus keeps everything sharp; after all, you can always crop it later. If your phone has the option, you can even try shooting in “Square” mode, which can help keep the composition balanced and Insta-ready.
Ad Loading...
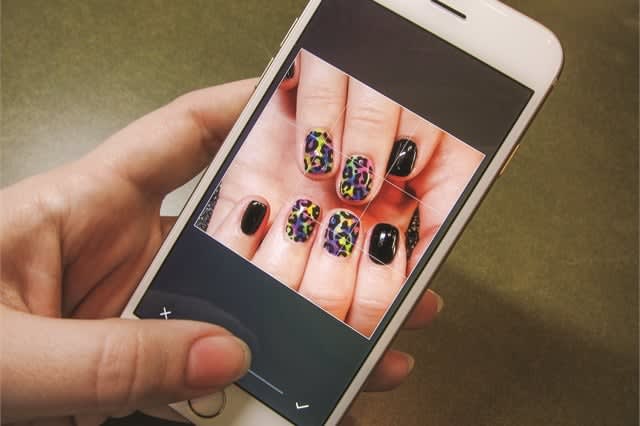
Crop your photos so nails are seen easily.
Edit your work. Though phones have built-in editing software these days, it can be helpful to get an app that is designed to help simplify the process for you. Here are some adjustments to try:
> Crop in close. There’s nothing more frustrating than having to squint to try to see the nails on a small screen.
> Dial up the brightness. Adding some extra brightness to your photo can make it easier to see and give it a clean, airy look.
> Add a bit of contrast. Mobile phones can sometimes make photos look dull. Contrast can help your shot pop! Be careful though — it can be easy to go overboard.
> Check your color. Interior lighting can give your photos a greenish or reddish cast. Play with color adjustments until the skin tones look natural.
Ad Loading...
Helpful Editing Apps
Afterlight: This is a fantastic, all-in-one photo editing app that allows you to adjust brightness, contrast, and even color tone. It’s a great go-to for all of your basic editing tasks.
Boomerang: Boomerang is used to make mini videos that loop back and forth. Use it to show off the sparkle of a rockstar glitter manicure or the shifting of a chameleon chrome.
Picframe: Use this app to make collages. Perfect for when you can’t capture everything in just one shot! (This is less useful now that Instagram lets you post multiple photos.)
Lens Distortions: Are your Swarovski nails not looking as blingy in photos as they do in person? Grab Lens Distortions and add on some artificial lens flare (sparingly!) for that so-shiny-it-blinded-the-camera look.
Instagram: You know Instagram, but did you know it’s great for basic, on-the-go editing? Trim down a video clip, adjust your crop, or bump up the contrast with a few easy taps.
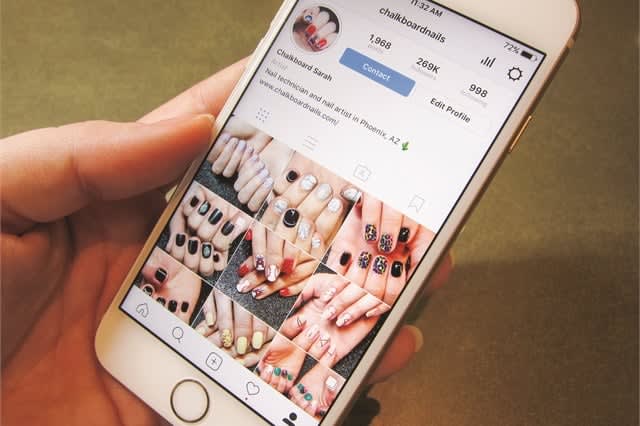
A consistent feed looks nice.
Develop your own style. Develop a recognizable photo style that works for you. Many new clients will check out your online portfolio when deciding whether to book with you, and a clean, cohesive Instagram or Facebook feed can give you a leg up.
NAILS’ new social media columnist Sarah Waite is a licensed nail tech and the creator of the popular nail art website www.chalkboardnails.com. Follow her on Instagram @chalkboardnails.
Square data shows that regular customers tip 11% higher and are shared across 32% of businesses in the same ZIP code, driving thousands of dollars in additional revenue per connection.
When Bowie Lau and Jeffrey Ching opened JBW Jeffrey Ching Salon in 2011, they weren’t just launching another luxury hair destination—they were building a business rooted in passion, artistry, and thoughtful growth.
Inside the Systems That Power an Elevated Salon Experience
From seamless online booking to a team-first culture, J Gold Salon in Atlanta offers more than great hair—it delivers consistent, high-touch service with the help of partners like Boulevard and American Express.
Want to grow your career as a beauty professional? K18 Sales Manager Sabrina Sanborn shares advice on networking, mentorship, and self-advocacy—from attending hair shows to finding the right guidance to reach your goals.
A combination of clear policies, effective communication, and strong client relationships has helped me create a more reliable and efficient booking system.
Founded by Cleveland serial entrepreneur Shaura Rodgers, Nailtorious has grown to include a nail supply megastore, training facilities, and retail line for nail techs.
This period after the holidays can bring on a huge lull for hairstylists. We asked Cosmo Prof's team of professionals to offer their best advice on how to deal with the January-February slow period.
Key highlights include a push toward inclusive spaces for all abilities, an emphasis on maximizing livable square footage, and a continued love for modern farmhouse exteriors.
The busy holiday season is here, and with it comes jam-packed days, last-minute client requests and booming retail sales. For many salon owners, the highlight of the season is Small Business Saturday® (SBS). This year on Saturday, November 30, consumers can take their shopping into the small businesses in their communities.
Want to become savvy about your personal finances, but don't quite know where to start? Anna Manukyan identifies six important concepts for building a strong financial foundation.
Salon owner Nuri Yurt had a dream of owning a salon on New York City’s Madison Avenue. "Through perseverance, hard work and stellar customer service, he and partner John Kaygisiz founded Toka Salon in 2007.
Vagaro has consistently been at the forefront of salon software technology, helping businesses be more efficient, create more effective communication, and even improve company culture. Now, Connect by Vagaro, the platform’s two-way communication capability, and Vagaro’s new generative AI tools are giving owners new opportunities to grow and expand.
This list of watch-outs from @jodydoesjels prompted us to reach out to her and learn more. We had already fallen for her hand-painted designs and now we wanted to know more about this list she created to help clients decide if she was the nail tech for them.
Education is necessary for beauty professionals to maintain their cosmetology licenses, and paying for that education can be burdensome, but it doesn't have to be. Understand which education tax credits can help you offset those costs.