Show Your Clients You Care With Homemade Holiday Gifts
Looking for a way to thank your loyal clients this holiday season? Why not give them something personal and homemade? We put together a group of simple projects that will show your customers just how much you care without breaking the bank or your skill level. Follow them exactly or add some custom changes to really make them your own.
by Kelsey Nolan
December 22, 2014
5 min to read
Five nail techs gave us step-by-step instructions for holiday gifts they’ve made for clients in the past. Each tech has created a personal and thoughtful way of thanking her loyal customers. As a bonus, find one tutorial from the editors at NAILS!
Regardless of your skill level, time limit, and budget, there are options that will work for you. So try your hand at these gifts and show your customers a little extra love these holidays.
Ad Loading...
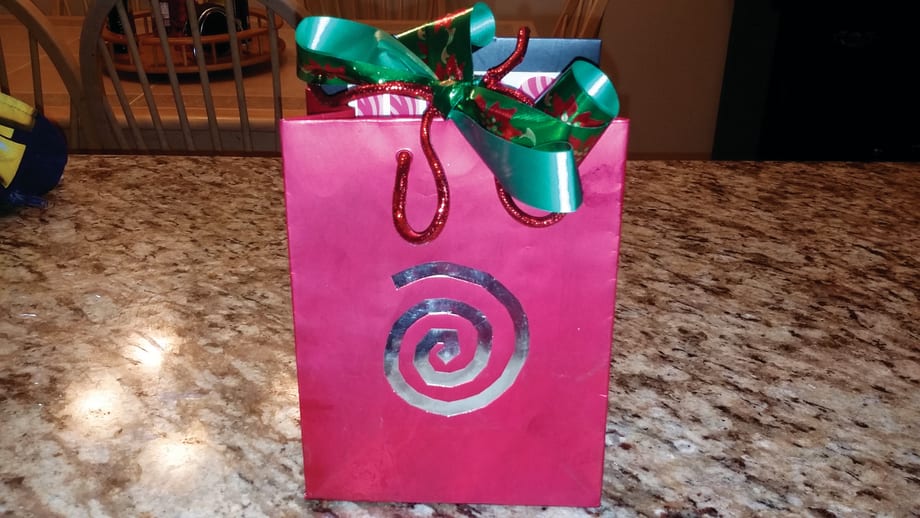
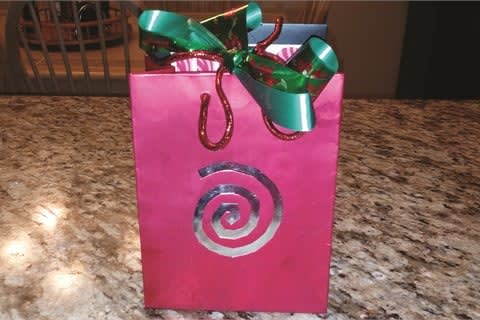
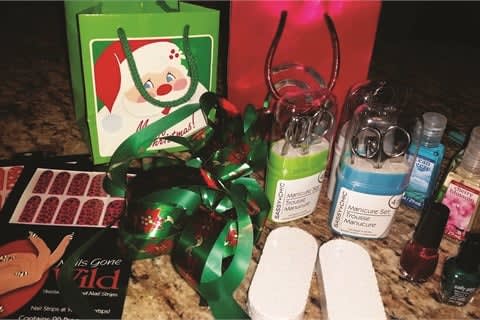
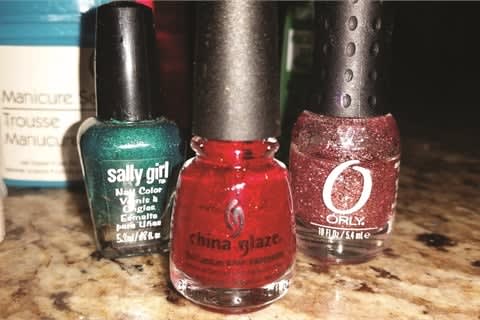
Goodie Bags
Tech: Eva Jenkins Salon: Extraordinary Nails by Eva Location: Bellevue, Neb. Time: 1 hour Cost: $50/10 bags
You will need: Small gift bags Ribbon Manicure set Nail polish (there are plenty of festive mini bottles around this time of year) Any extra goodies
Step 1: Fill the small bags up with all the essential nail goodies.
Step 2: Tie with ribbon and that’s it!
Ad Loading...
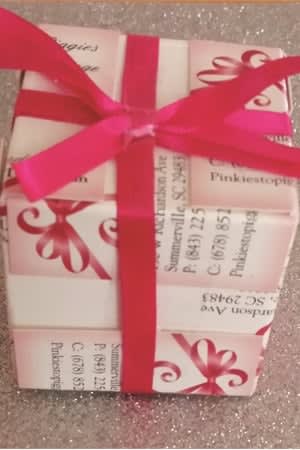
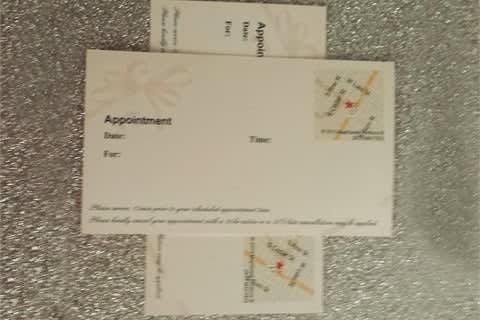
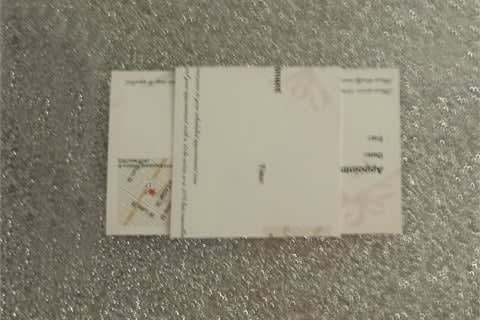
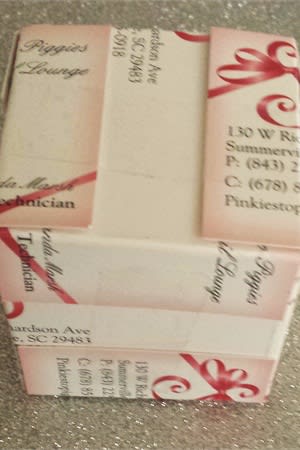
Business Card Gift Box
Tech: Shewanda Marsh Salon: Pynk Dymond Nails Location: Goose Creek, S.C. Time: 5 minutes Cost: $2/box
You will need: Six business cards Ribbon Cuticle oil or other small gift bottle
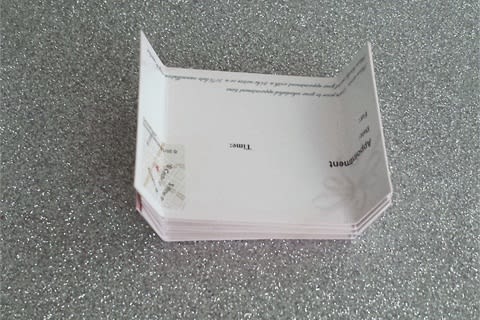
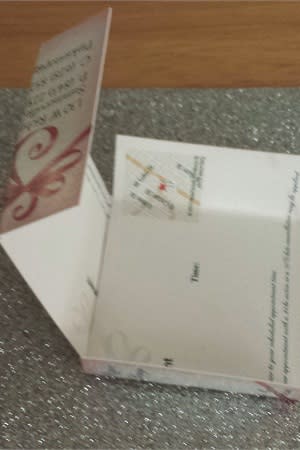
Step 1: Fold the cards into pieces suitable for assembling into a cube by taking two cards and placing them across each other, with the inside faces together. Try to make the 90-degree angle between them as accurate as possible, because each card serves as a guide for the folds in the other.
Step 2: Fold the ends of the bottom card up over the top card. Make the folds nice and crisp; the crisper the fold, the snugger the final cube will be.
Ad Loading...
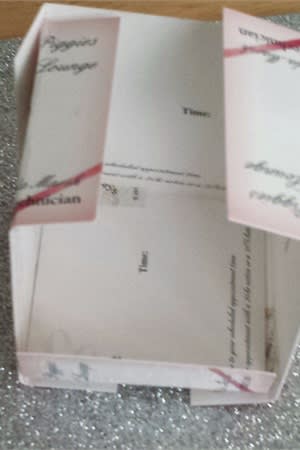
Step 3: Flip the pair over so the bottom folded card becomes the top card.
Step 4: Fold the other card’s ends up.
Step 5: Pull the two cards apart: you’ve made two cube pieces. If you’ve made the folds tight, the pieces will be more “closed up” than shown here; that’s good.
Step 6: Repeat steps 1 through 5 two more times. Now you have six cube pieces. You are ready to begin assembly.
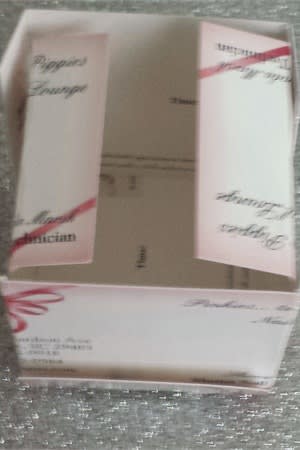
Step 7-10: Assembling the pieces
Ad Loading...
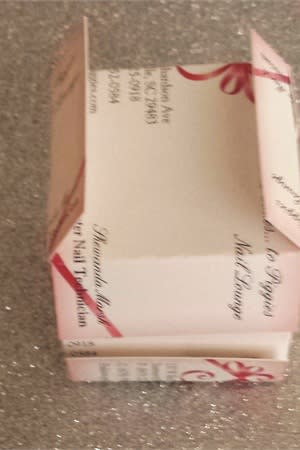
Now that you have six cube pieces, you can assemble them into a cube. This requires a little bit of dexterity, but is not as hard as it might seem. At each step, make sure that the new card you’re adding to the cube is hugging the existing cards with its folded tabs. At the last step, you would place your gift item inside the cube — I put a small bottle of cuticle oil to remind my client of after-service care tips. In order to close off the cube, you will need to carefully pry open the remaining tabs to get the last card in properly (under the other cards’ tabs, but with its tabs over its neighbors). Then tie a really cute ribbon around the box into a bow.
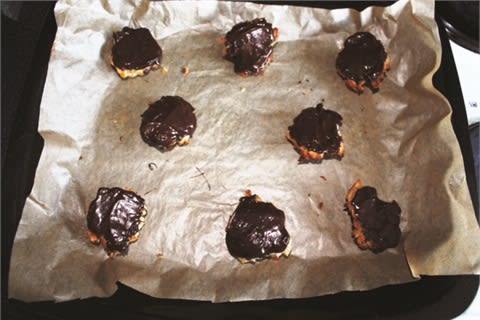
Festive Florentines
Tech: Alicia Jelley Salon: Alicia Coletta Nails & Beauty Location: Flintshire, Wales Time: 20 minutes Cost: $10/20 Florentines
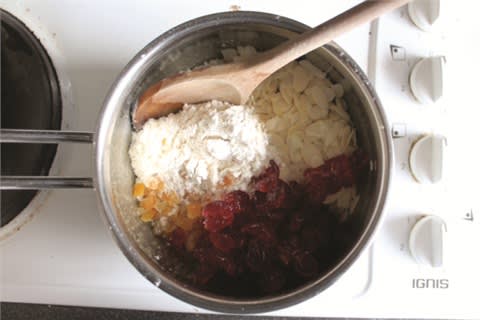
You will need: .75 oz. butter 1.75 oz. Demerara sugar (also called Turbinado) 1.75 oz. golden syrup (can substitute mix of two parts light corn syrup to one part molasses) 1.75 oz. plain flour 1.75 oz. flaked almonds 12 glacier cherries, chopped 7 oz. dark chocolate Makes 8 Florentines
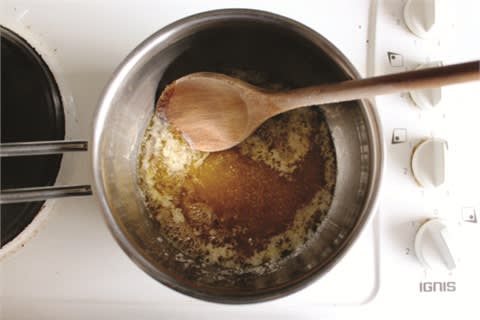
Step 1: In a pan, melt the butter, sugar, and syrup until combined together, then take off the heat.
Ad Loading...
Step 2: Add the flour, cherries, and almonds to the pan and mix thoroughly.
Step 3: Divide the mixture into small balls, place on a baking tray with grease-proof paper, and flatten slightly, making sure there’s plenty of space between them.
Step 4: Bake for 8-10 minutes at 180ºC (around 350ºF) or until golden brown.
Step 5: Remove and leave to cool.
Step 6: Meanwhile melt the chocolate in a bowl over some hot water.
Ad Loading...
Step 7: Spread the chocolate onto the base of the Florentines and leave to cool or set in the fridge.
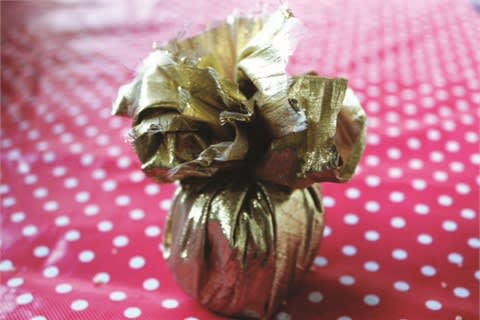
Step 8: Find some festive paper and ribbon, and wrap two or three Florentines inside to make a little parcel.
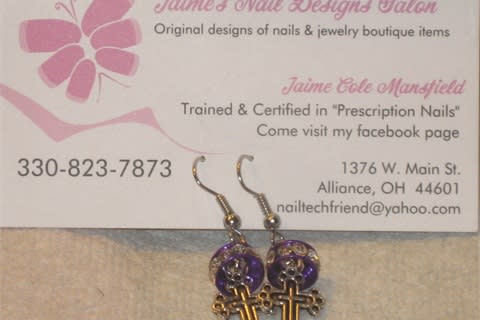
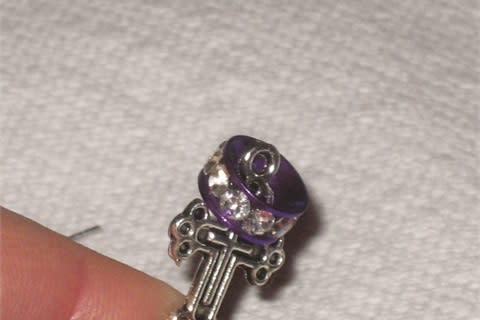
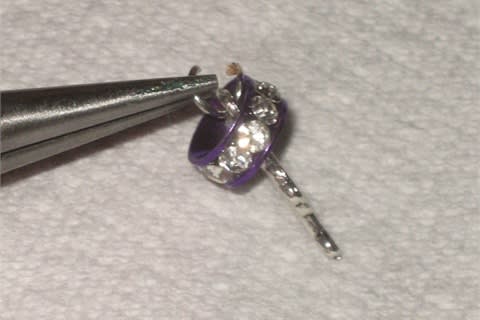
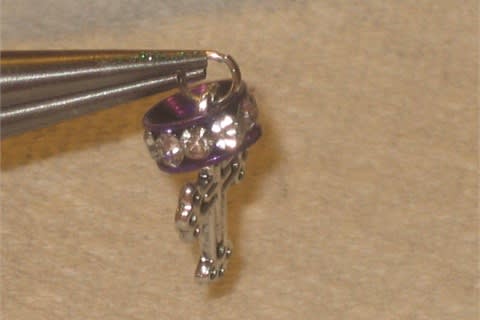
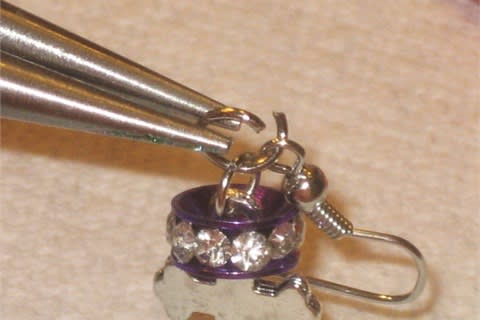
Inspirational Pierced Earrings
Tech: Jaime Mansfield Salon: Jaime’s Nail Designs Salon Location: Alliance, Ohio Time: 10 minutes Cost: $.70/pair
You will need: 2 cross charms 4 jump rings 2 wire earring hooks 2 Rondell crystal spacer beads.
Ad Loading...
Step 1: Hold the cross charm and put a spacer bead on top of it. It should slide over the top easily.
Step 2: Open a jump ring and attach it to the loop part of the charm.
Step 3: Attach that ring to the earring and pinch it closed.
Step 4: If you’d like longer earrings, add additional jump rings.
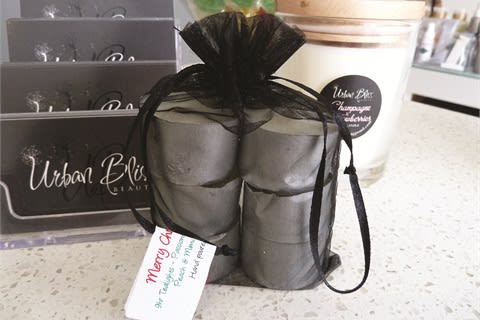
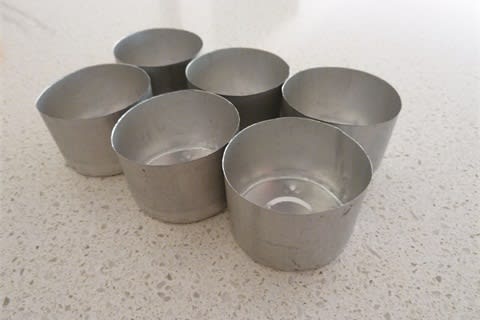
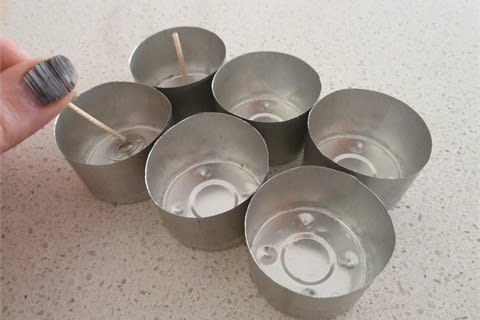
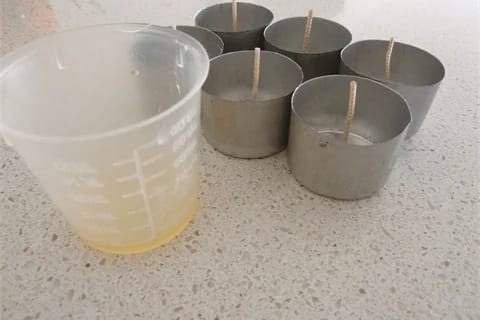
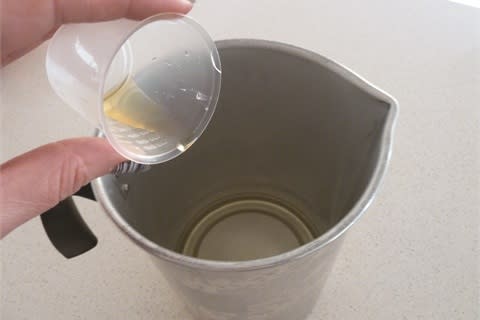
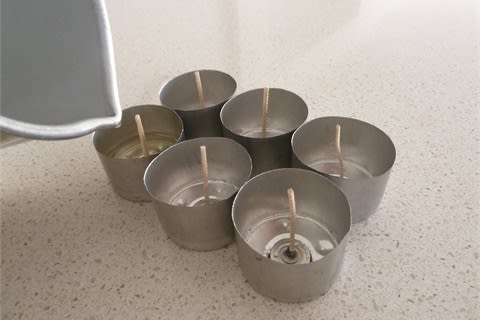
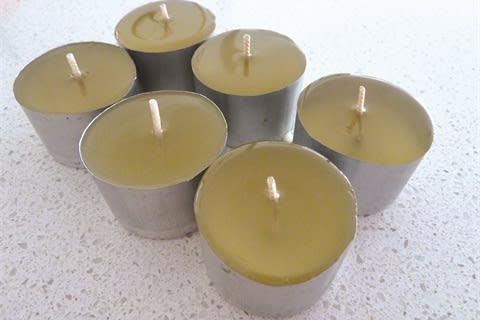
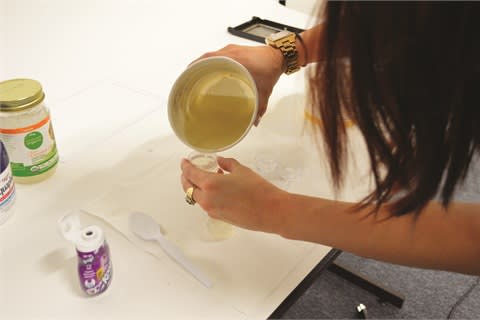
Scented Tea Light Candles with Soy Wax
Ad Loading...
Tech: Simone Gilbert Salon: Urban Bliss Beauty Location: Ferntree Gully, Australia Time: 3 hours, depending on experience Cost: $60/5 gift bags
You will need: Soy Wax Fragrance oil or essential oil Measuring cup Tea light cups Wicks Glue gun (cost does not include) Saucepan and heatproof jug or double-boiler saucepan Packaging Ribbons Gift tags
Step 1: Set out the tea light cups ensuring they have space around each one.
Step 2: Using a hot glue gun (or double-sided tape) affix the wicks to the tea light cups.
Step 3: Measure out your chosen fragrance according to the package instructions or essential oil and set aside.
Ad Loading...
Step 4: Heat the wax in a heatproof jug and saucepan of boiling water or a double-boiler at a low temperature and remove from heat once the wax is melted. Once cooled a little, add the fragrance and stir to combine.
Step 5: Pour into the tea light cups and allow sufficient setting time.
Step 6: Package the tea lights any way you like, and voila!
And one from NAILS!:
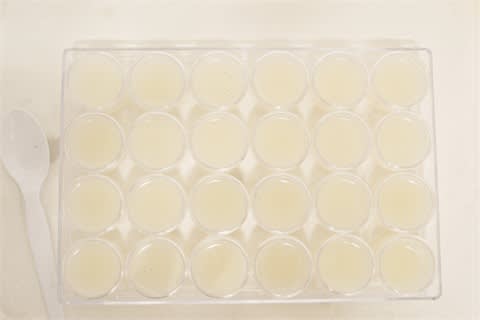
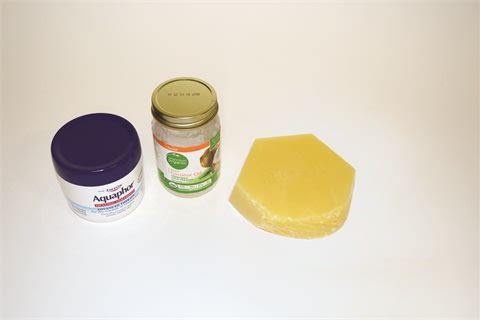
Lip Balm
Ad Loading...
Location: Los Angeles Time: 1 hour Cost: $60/50-75 lip balms
You will need: 16 Tbs. coconut oil 12 Tbs. Aquaphor 4 Tbs. beeswax, shaved Small containers
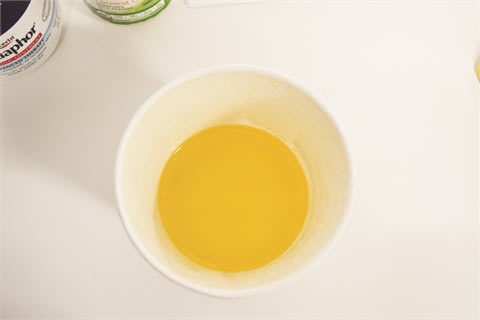
Step 1: Mix first three ingredients in a microwave-safe bowl.
Step 2: After blended, heat for one minute or however long it takes for the wax to be fully melted.
Step 3: Pour mixture into the containers and pop it into the fridge for an hour or two.
Square data shows that regular customers tip 11% higher and are shared across 32% of businesses in the same ZIP code, driving thousands of dollars in additional revenue per connection.
When Bowie Lau and Jeffrey Ching opened JBW Jeffrey Ching Salon in 2011, they weren’t just launching another luxury hair destination—they were building a business rooted in passion, artistry, and thoughtful growth.
Inside the Systems That Power an Elevated Salon Experience
From seamless online booking to a team-first culture, J Gold Salon in Atlanta offers more than great hair—it delivers consistent, high-touch service with the help of partners like Boulevard and American Express.
Want to grow your career as a beauty professional? K18 Sales Manager Sabrina Sanborn shares advice on networking, mentorship, and self-advocacy—from attending hair shows to finding the right guidance to reach your goals.
A combination of clear policies, effective communication, and strong client relationships has helped me create a more reliable and efficient booking system.
Founded by Cleveland serial entrepreneur Shaura Rodgers, Nailtorious has grown to include a nail supply megastore, training facilities, and retail line for nail techs.
This period after the holidays can bring on a huge lull for hairstylists. We asked Cosmo Prof's team of professionals to offer their best advice on how to deal with the January-February slow period.
Key highlights include a push toward inclusive spaces for all abilities, an emphasis on maximizing livable square footage, and a continued love for modern farmhouse exteriors.
The busy holiday season is here, and with it comes jam-packed days, last-minute client requests and booming retail sales. For many salon owners, the highlight of the season is Small Business Saturday® (SBS). This year on Saturday, November 30, consumers can take their shopping into the small businesses in their communities.
Want to become savvy about your personal finances, but don't quite know where to start? Anna Manukyan identifies six important concepts for building a strong financial foundation.
Salon owner Nuri Yurt had a dream of owning a salon on New York City’s Madison Avenue. "Through perseverance, hard work and stellar customer service, he and partner John Kaygisiz founded Toka Salon in 2007.
Vagaro has consistently been at the forefront of salon software technology, helping businesses be more efficient, create more effective communication, and even improve company culture. Now, Connect by Vagaro, the platform’s two-way communication capability, and Vagaro’s new generative AI tools are giving owners new opportunities to grow and expand.
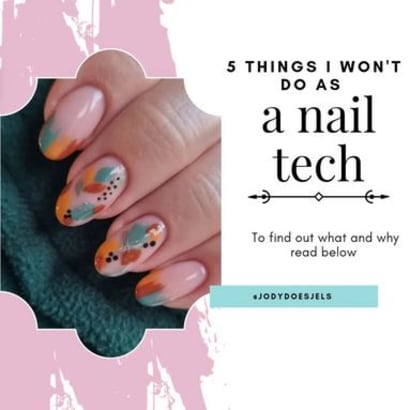
This list of watch-outs from @jodydoesjels prompted us to reach out to her and learn more. We had already fallen for her hand-painted designs and now we wanted to know more about this list she created to help clients decide if she was the nail tech for them.
Education is necessary for beauty professionals to maintain their cosmetology licenses, and paying for that education can be burdensome, but it doesn't have to be. Understand which education tax credits can help you offset those costs.